
Quick Note: “I Tried It’ is a series where I replicate makeup looks using products I already have on hand, or try new/suggested products. Hopefully this will inspire you to try your own versions of looks you love! HERE’s the last I Tried It.
Welcome to this installment of I Tried It featuring Emily Ann Gemma of The Sweetest Thing. I’ve followed her for years, but I’m not sure how I found her…maybe someone else I followed tagged her? Anyway, she shares great makeup and beauty picks weekly, but what I find fascinating is even though she basically does the same makeup routine all the time, it never gets old.

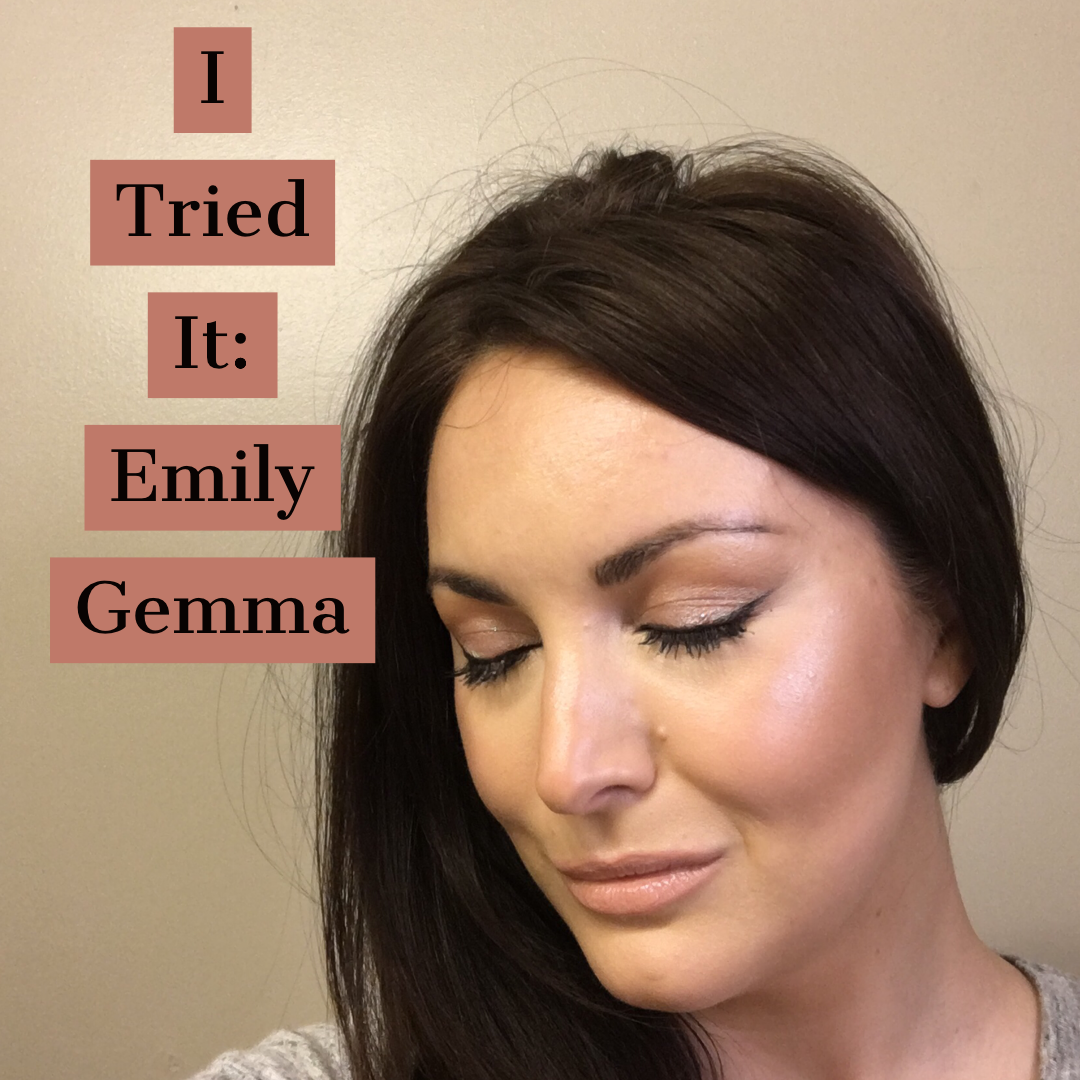
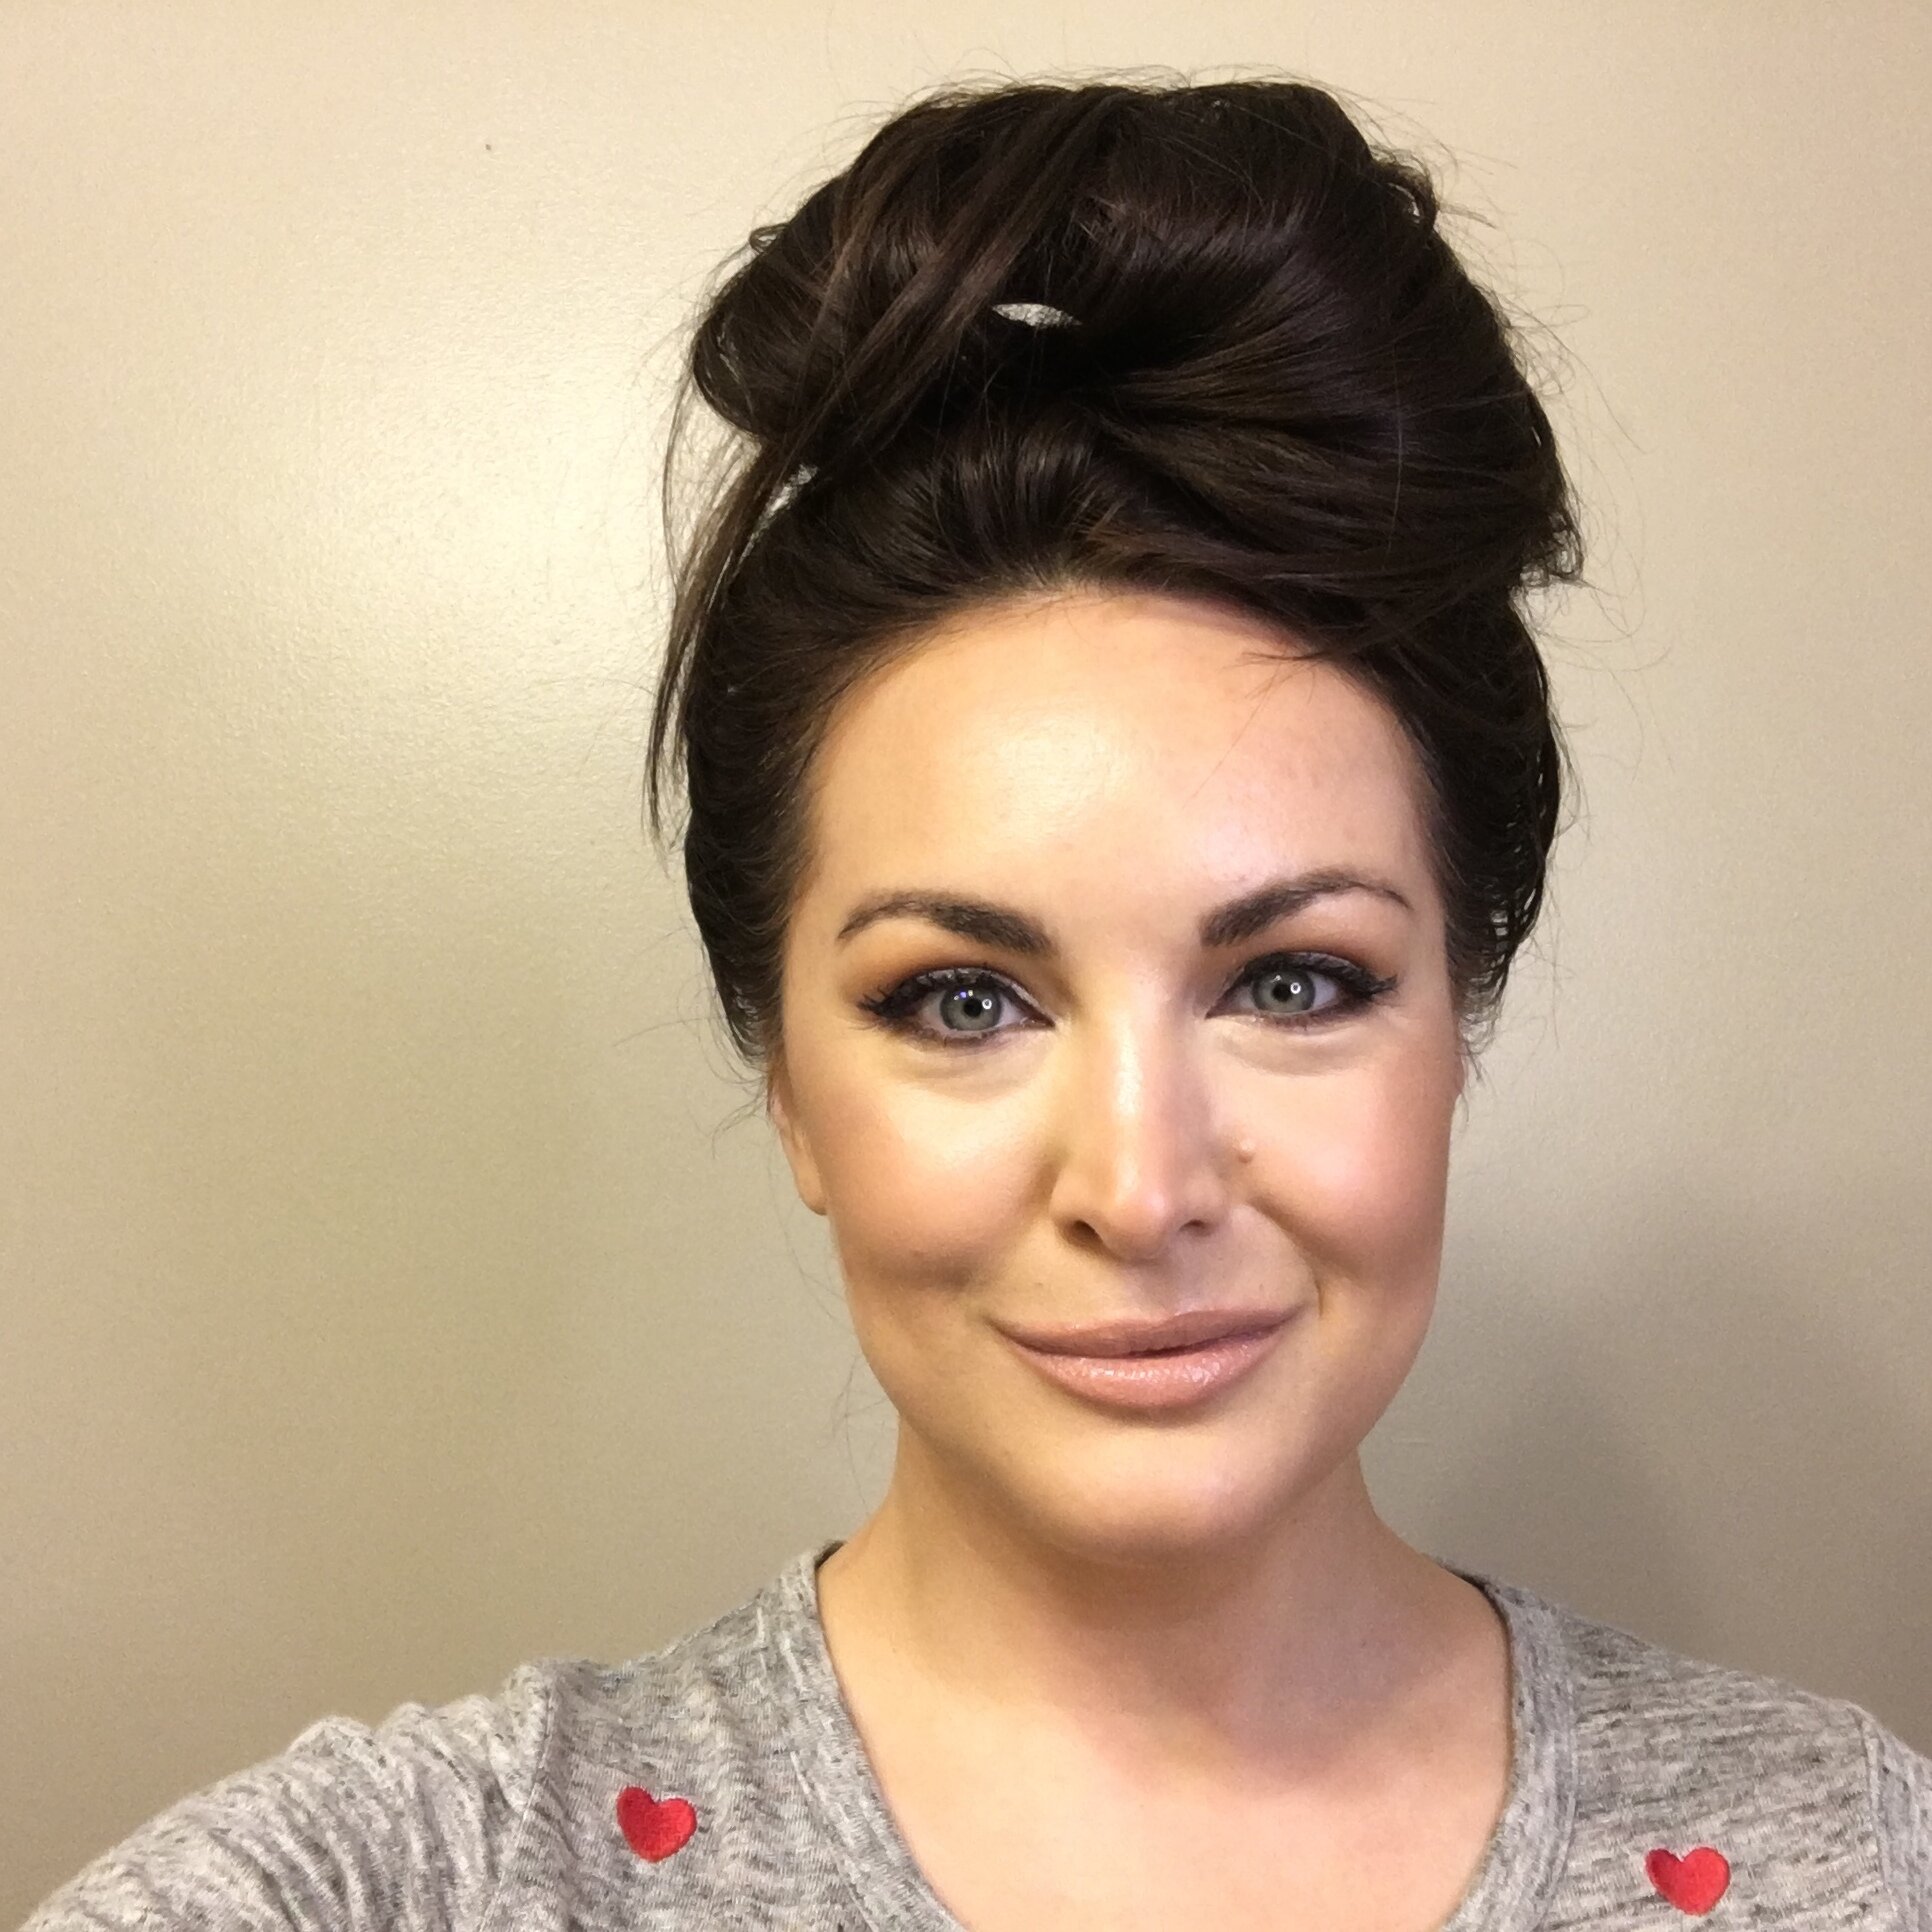
Before/After
After a deep dive into her posts and videos, I gathered the similar products I already own and recreated the look (with a few tweaks). It’s simple but makes a huge impact, and it will definitely end up in my rotation. The products I used (and swapped) versus Emily’s suggestions are listed below, and the tutorial can be found below that.
You can visit Emily’s blog at www.TheSweetestThingBlog.com and follow her on Instagram @emilyanngemma, and HERE is her current makeup routine.
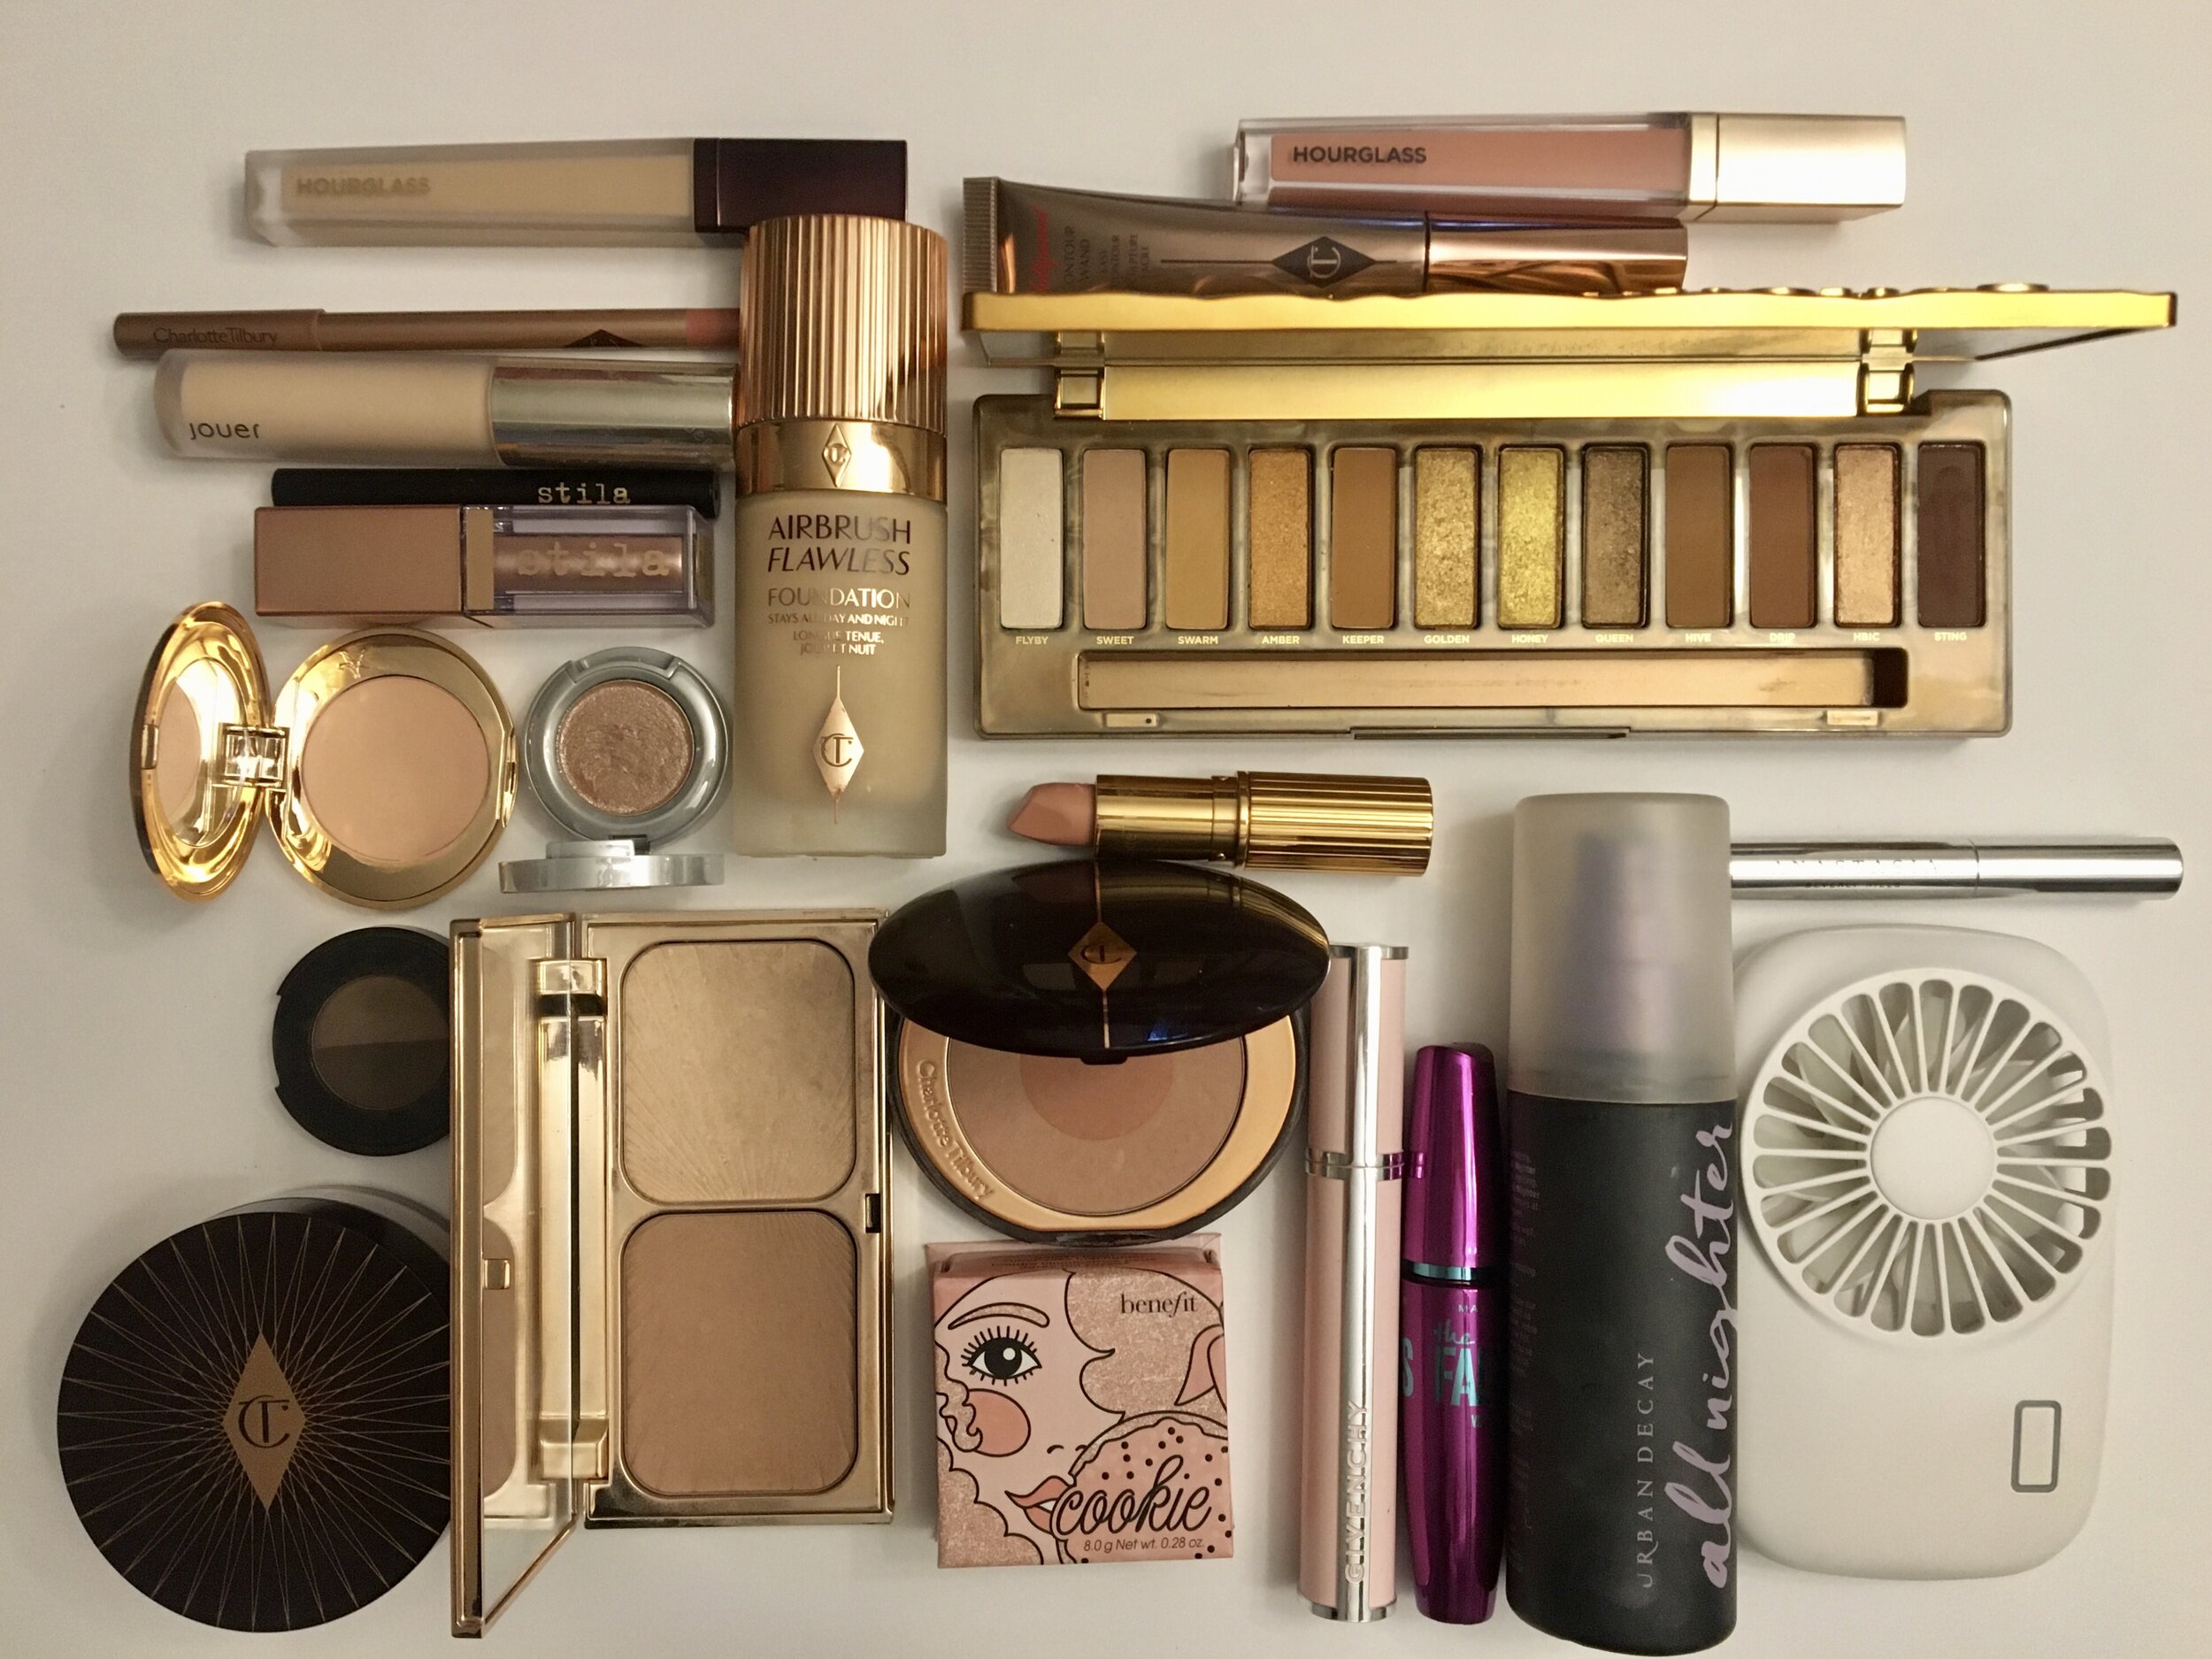
PRODUCTS
EYES
Since Emily has lash extensions, I prepped lashes with a coat of primer and let it dry while doing eye makeup.
Next I prepped eyes with concealer and powder, then used the Urban Decay Naked Honey Palette (Emily typically uses shades from the Reloaded palette but has also discussed this one) - Keeper in the crease and under bottom lash line then Drip deeper into the crease

Swapped her Too Faced Eye Shadow Veil in Pop the Bubbly! for my Stila Liquid Eye Shadow in Kitten
Swapped her Natasha Denona Top Coat for my Urban Decay Moondust Eye Shadow in Space Cowboy
Stila Stay All Day Liquid Eyeliner in Intense Black
Curled lashes and applied two coats of Maybelline Falsies mascara – I used what I had open but Emily uses Charlotte Tilbury Legendary Lashes 2 and ! own/love it, too
SKIN – basically all CT!
Emily likes matte skin while I prefer glow, so I prepped skin with Charlotte Tilbury Magic Cream (which Emily also uses)
Prepped under eyes with Charlotte Tilbury corrector
Topped all skin, including under eyes, with Charlotte Tilbury Airbursh Flawless Foundation (shade 5.5 Neutral) using a flat-top kabuki brush (Emily uses the Sigma F80, I use the Sonia Kashuk Flat Top Foundation Brush), then pressed it all in with a Beauty Blender
Used Hourglass Vanish Concealer under eyes and where I wanted extra coverage and light
Charlotte Tilbury Contour Wand in Fair-Medium to add depth
Emily typically uses a couple of different powders for setting, baking and blurring, but as y’all know I’m not a fan of powder so I just used a bit of the Charlotte Tilbury Magic Powder, which Emily has used, to gently set
Just the bronzer from the Charlotte Tilbury Filmstar Bronze & Glow palette
I literally had zero of Emily’s blush picks, but she said she loved Charlotte Tilbury blushes in a video a couple of years ago, so I used Charlotte Tilbury blush in First Love
Benefit Cookie highlighter
A little brightness in inner corner of eyes was needed – Emily uses Too Faced Born This Way Concealer as well as Tarte Shape Tape, so my dupe is another full-coverage, slightly dry concealer: Jouer Essential High Coverage Liquid Concealer in Chiffon
Although Emily rotates a few different setting sprays, I used my favorite (and only) spray, the Urban Decay All-Nighter. I also used the fan she’s mentioned multiple times - necessary? Nope. A portable fan that cools you off on a hot summer’s day and sets your makeup? Absolutely.
BROWS
While we both love the Anastasia Beverly Hills Brow Powder Duo (I use Dark Brown), she uses a Dior product to set – I used the ABH Clear Brow Gel
LIPS
Charlotte Tilbury Lip Cheat in Pillow Talk and lipstick in Kim KW, Hourglass gloss in Child
WHAT I’D CHANGE
First, the lashes. Emily has gorgeous lash extensions and, since I have to slap on falsies, that’s not something I’m willing to do every day. The lashes, though, are what really take this look from nice to WOW, so it is worth the investment.
Second, I prefer a lighter, dewier complexion unless I’m having photos taken. Today I skipped her primer, and I didn’t bake or use as much powder; but if you need to lock in your makeup, Emily’s technique can be found HERE.
And so…
Overall, this is heavier makeup than I prefer or have time to do every day, but there’s no doubt it’s really pretty. Every time I’d catch myself in the mirror I’d be like “Oh hiiii winged liner!” One of my struggles is making my eyes look rounder, and this accomplished that without doing my normal tricks so I learned something new. Success!
Just like I found Emily through someone else, I’d really appreciate it if you would share this post or tag a friend on Instagram. My goal is to grow this community this year, so I would be so grateful for your help! Enjoy the tutorial below. -JY