eye makeup

Color Pops

IMG_9406.jpg

So Saint Patrick's Day is tomorrow, and you decide to incorporate some green into your makeup.  You do a Google search and find lots of really cool ideas if you were gong to the club, but you're going to the office or to a play date and you don't want to scare anyone. Let me introduce you to what I'll call the "color safe" zones.

The outer corner of your eye and the bottom lash line are both relatively innocuous areas where you can add subtle pops of color while keeping the rest of your makeup neutral.  Obviously, if you're going for neon or very intense colors some adjustments might need to be made, but you'd be surprised what you can get away with in these color safe zones.

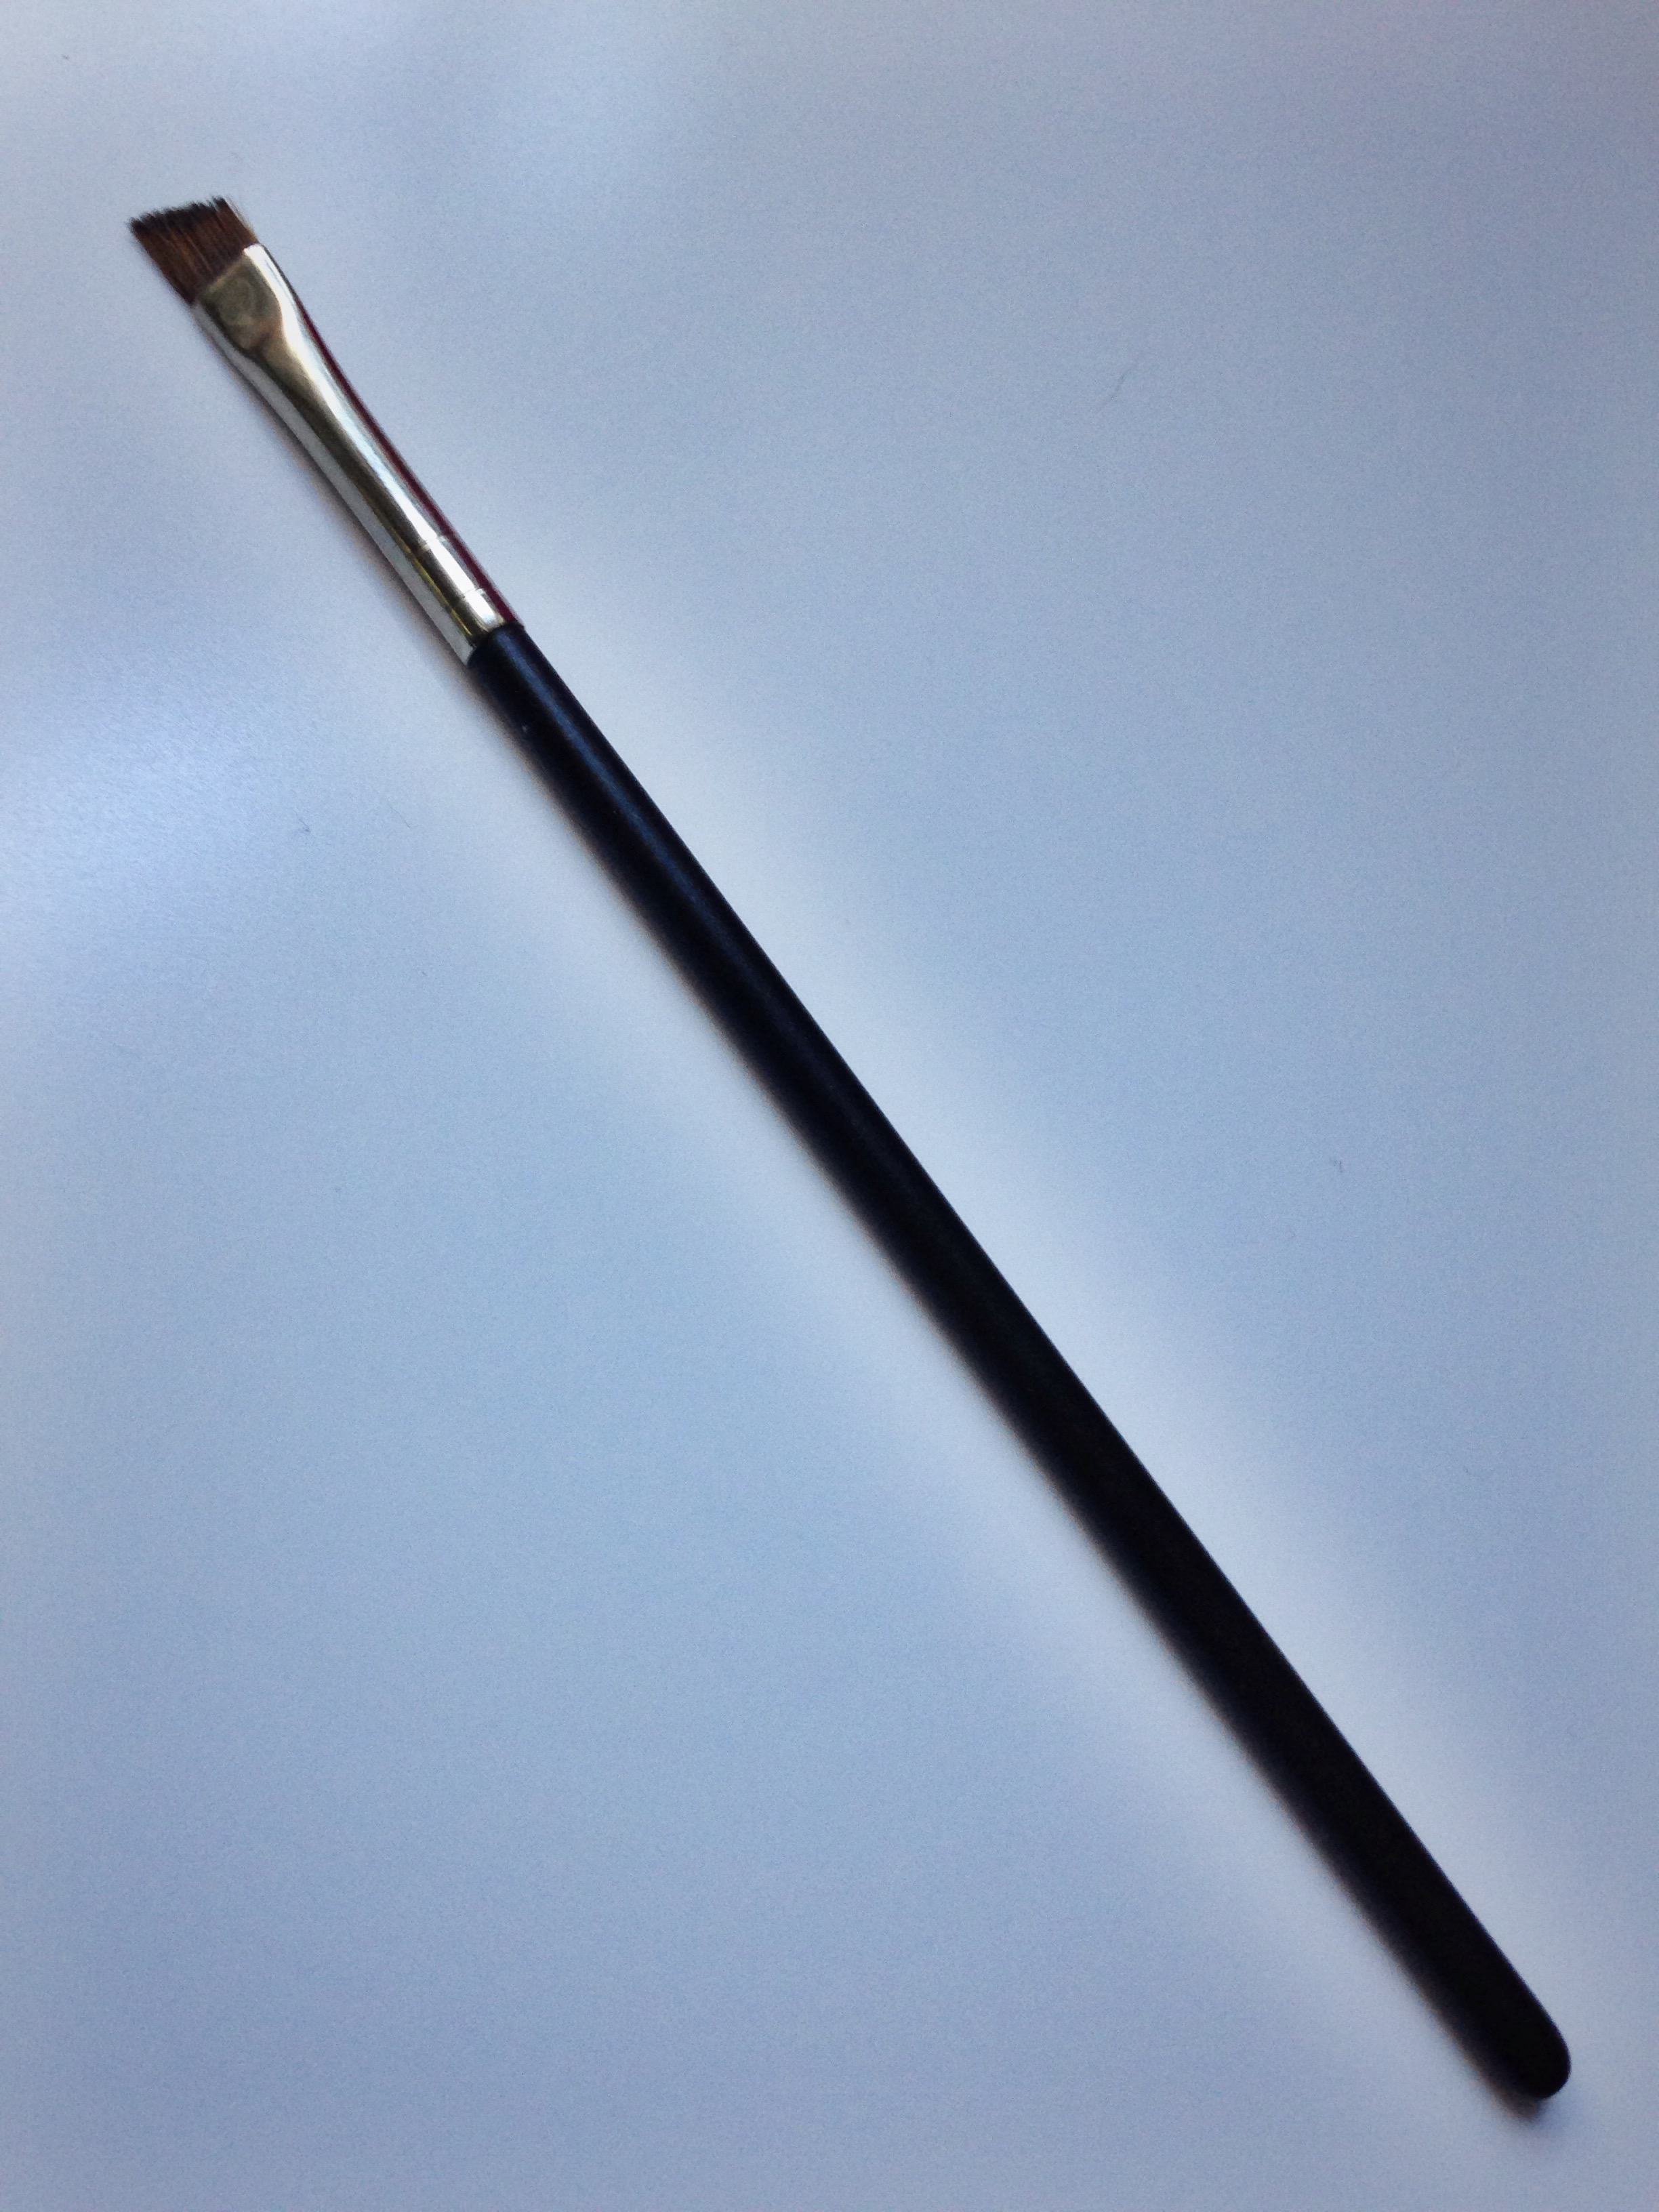
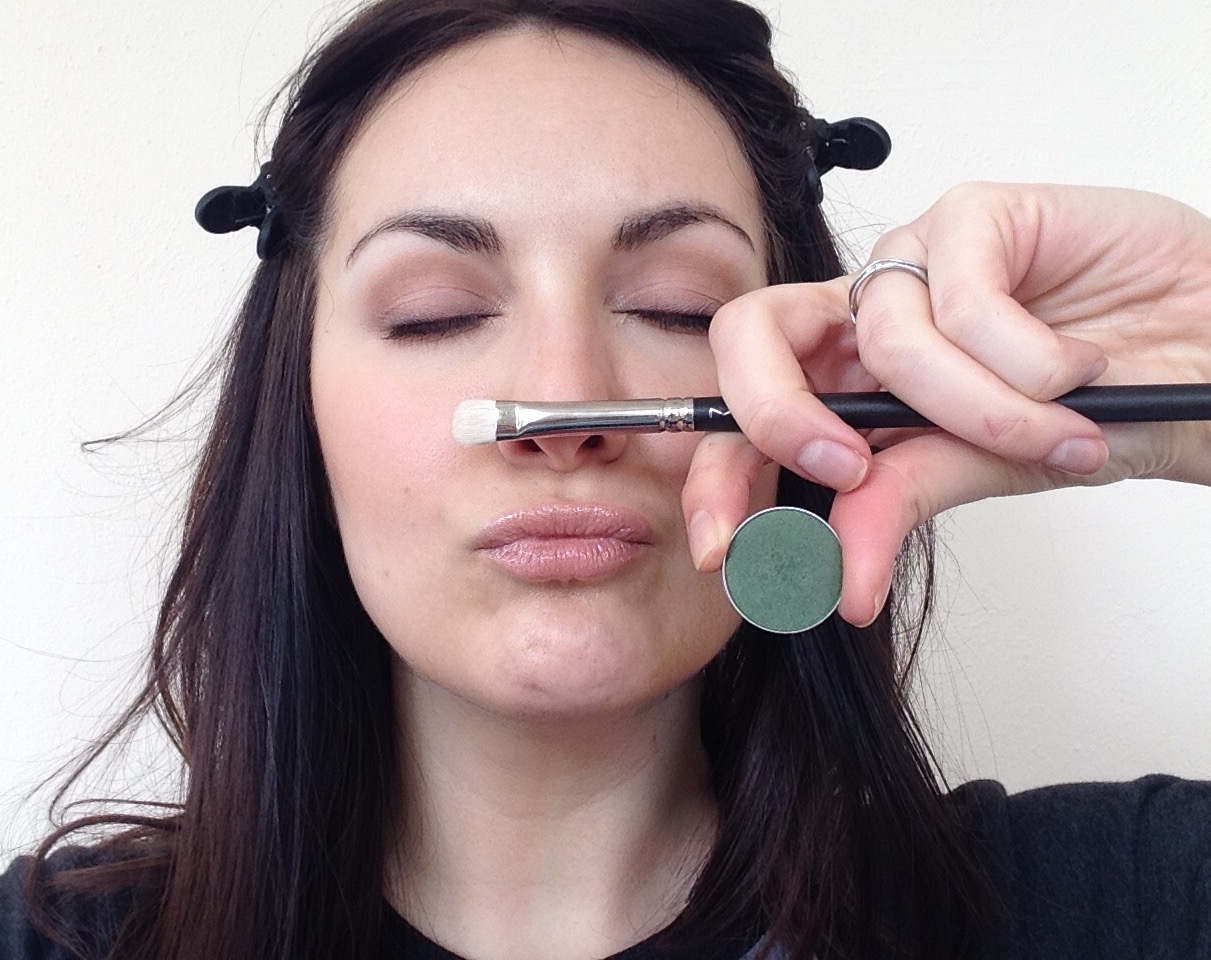
Better still, no special equipment is needed.  All you need is a small, clean brush and a colorful eye shadow...I'm using Humid by MAC and a plain, old eye shadow brush.

FullSizeRender (3)

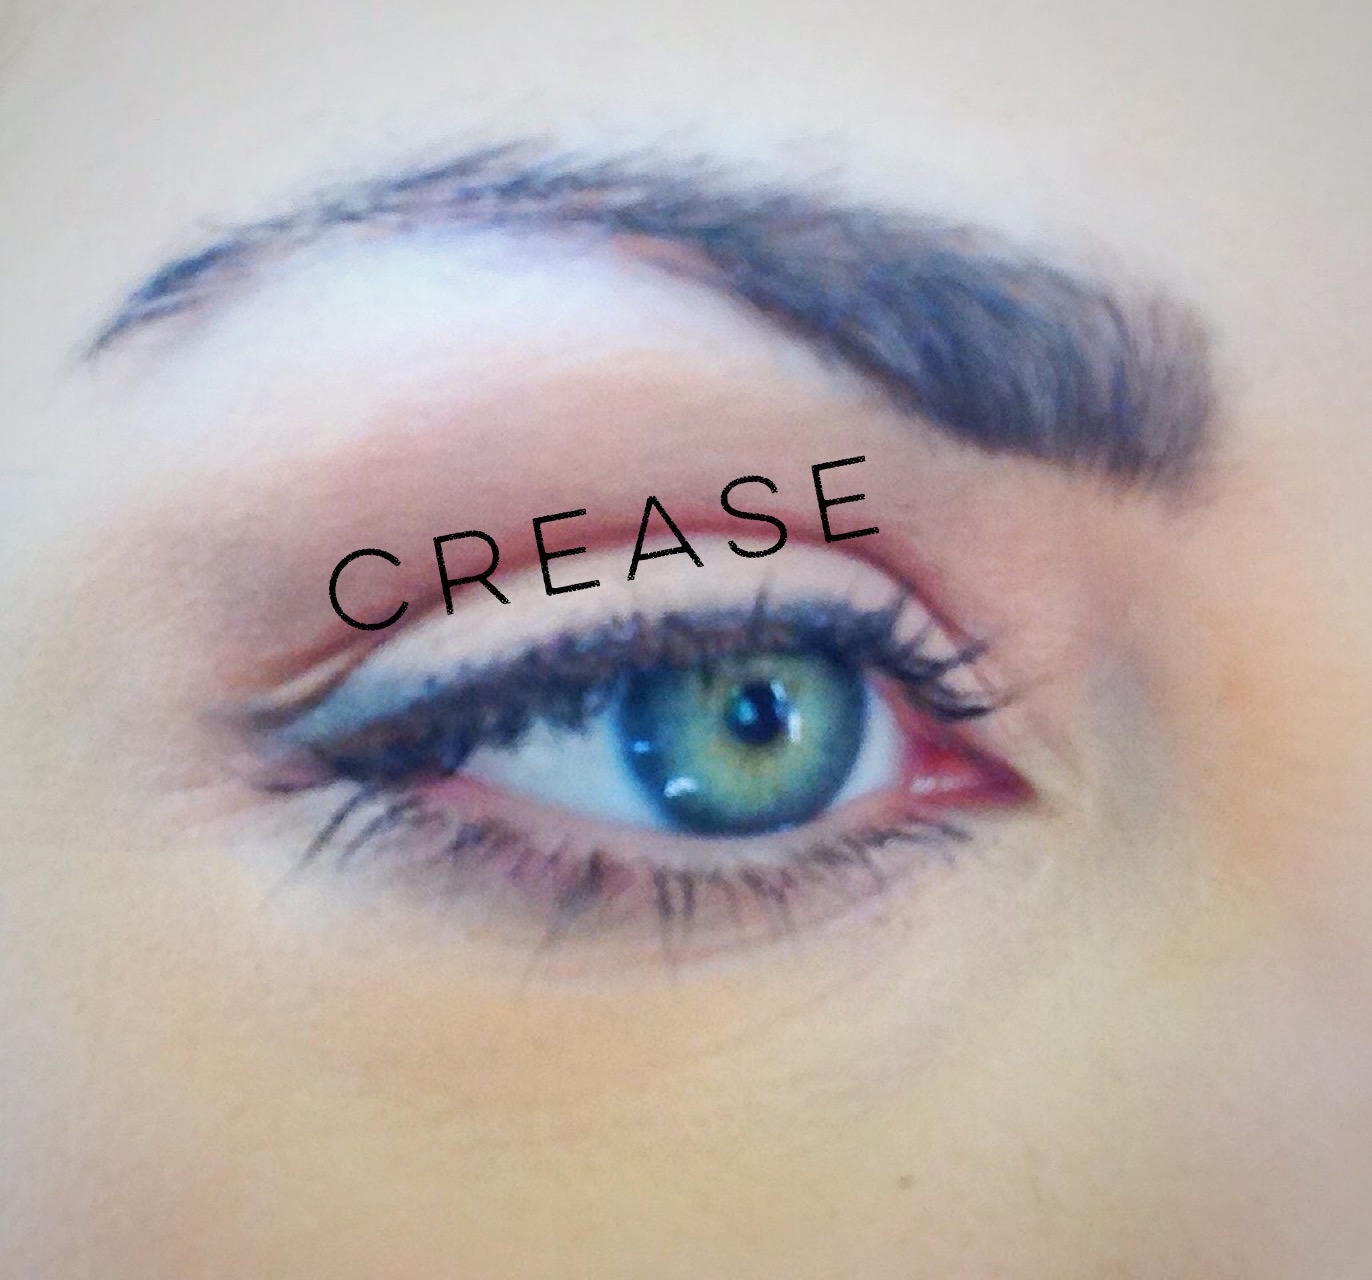
Under Eye Pop of Color

Simply line your bottom lashes with a colorful eye shadow while doing a typical lighter color shadow on the lid and a mid-tone shadow in the crease.  Even if you don't regularly wear eye liner, you might want to at least apply a darker liner at the upper lash line for balance.

FullSizeRender (4)

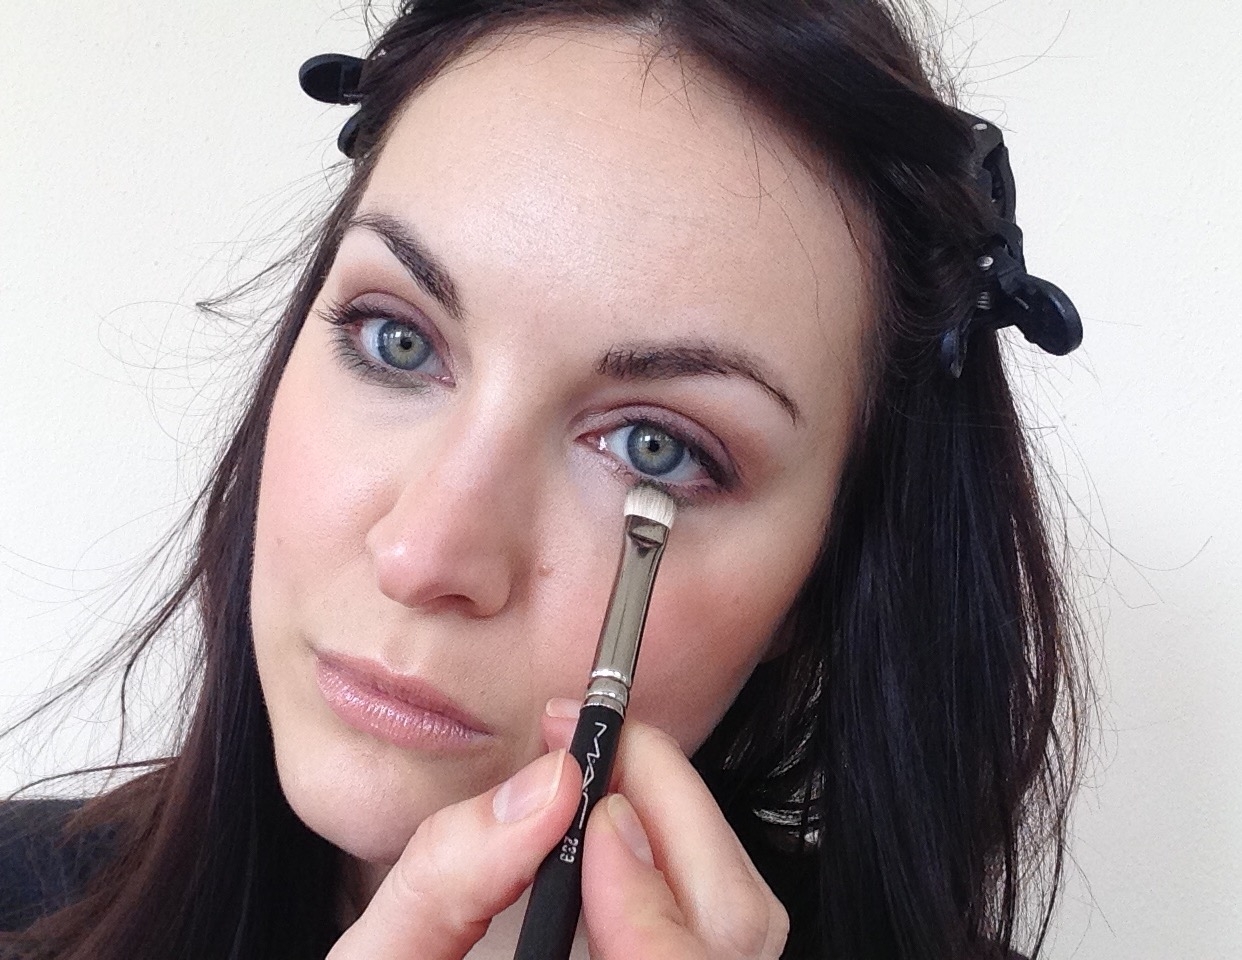
You can absolutely use an eyeliner, but the reason I like using a shadow is because powders are less inclined to run.

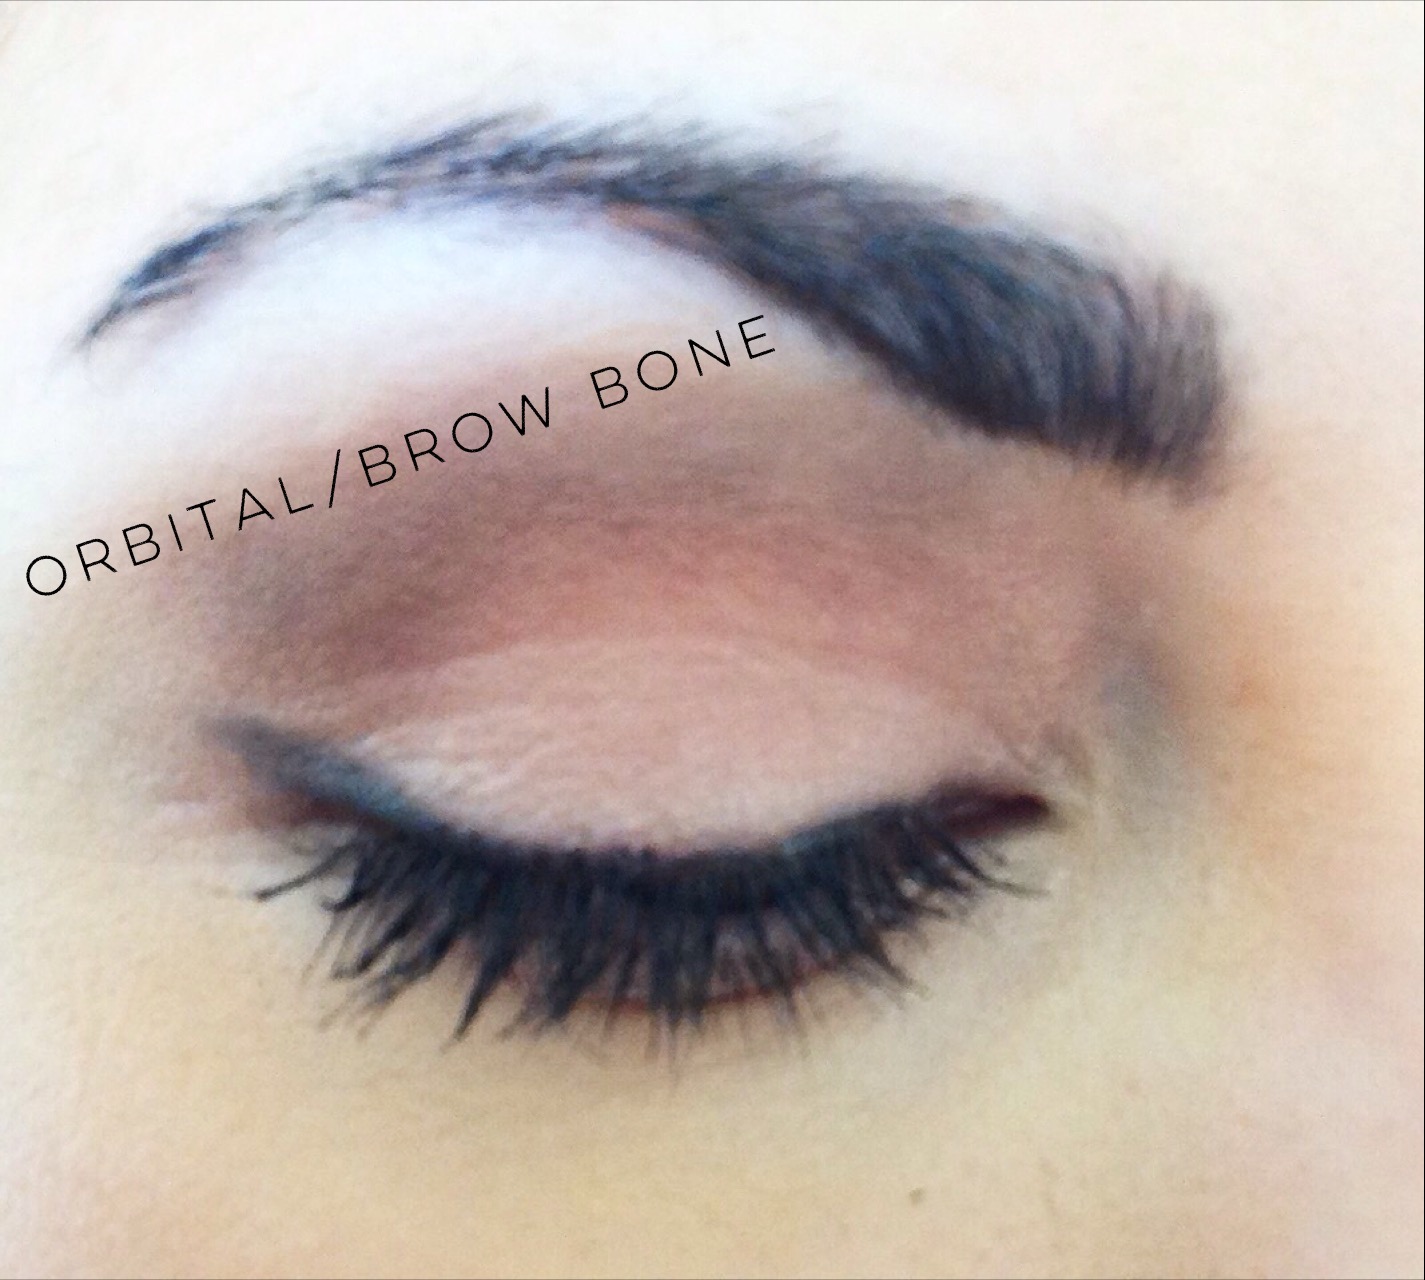
Outer Corner Pop of Color

Starting with a typical lighter-on-the-lid-darker-in-the-crease eye shadow look again, take a small brush, fill it up with your color of choice, and place it on the outer corner. Next, sweep inward and down forming a right triangle (strait edge is the outside of your eye and the point is towards your inner corner) so the color diffuses about 1/3 of the way in.

FullSizeRender

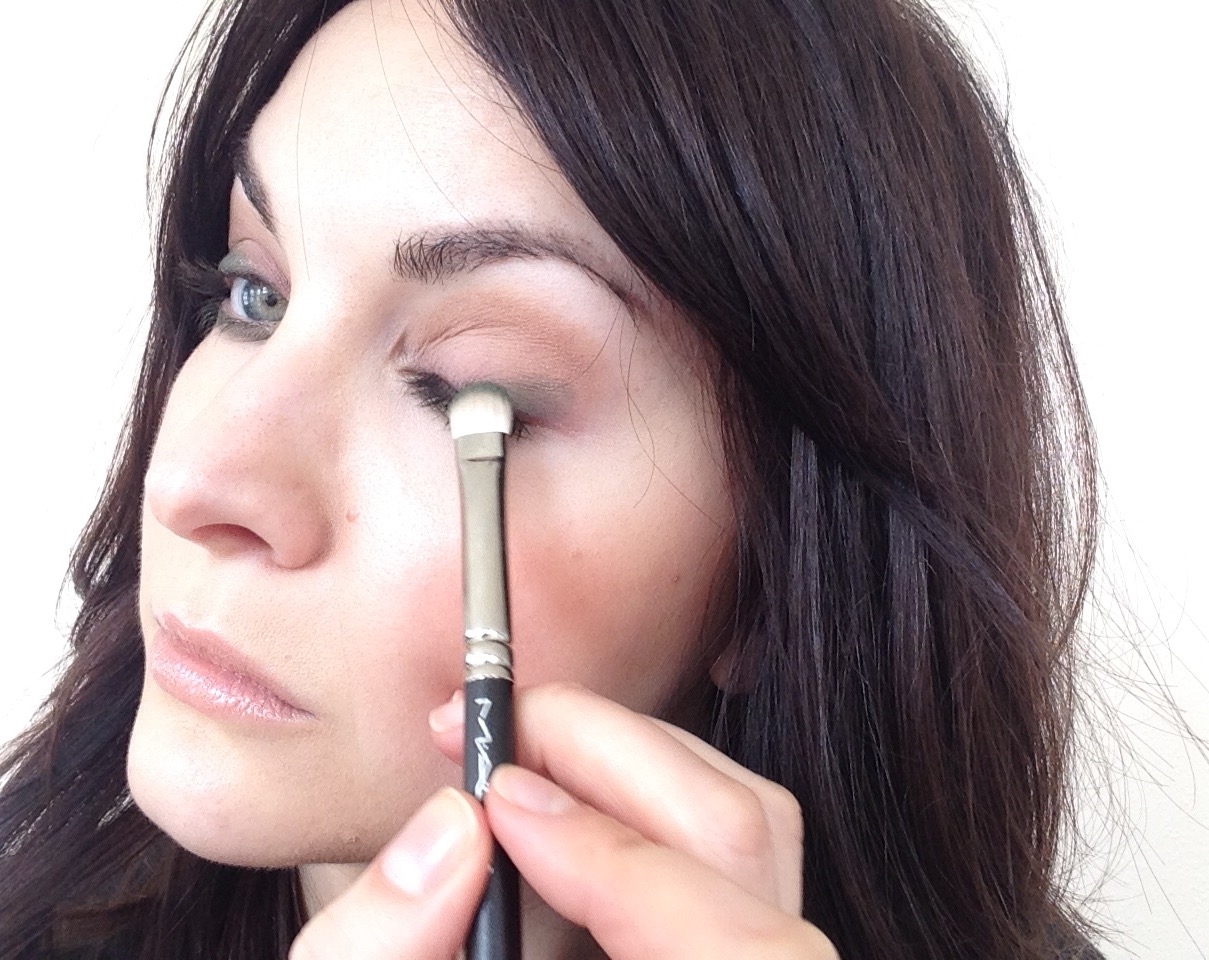
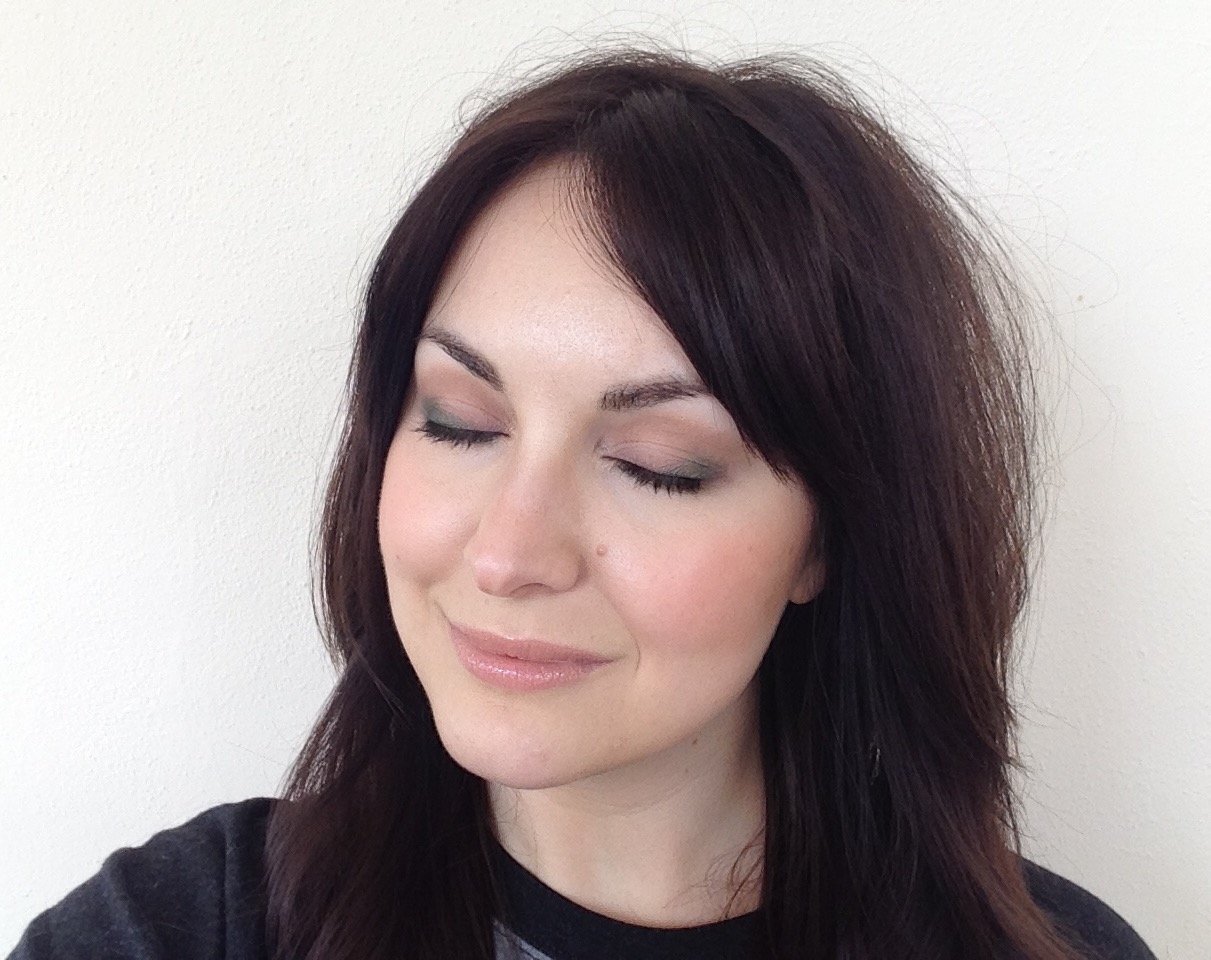
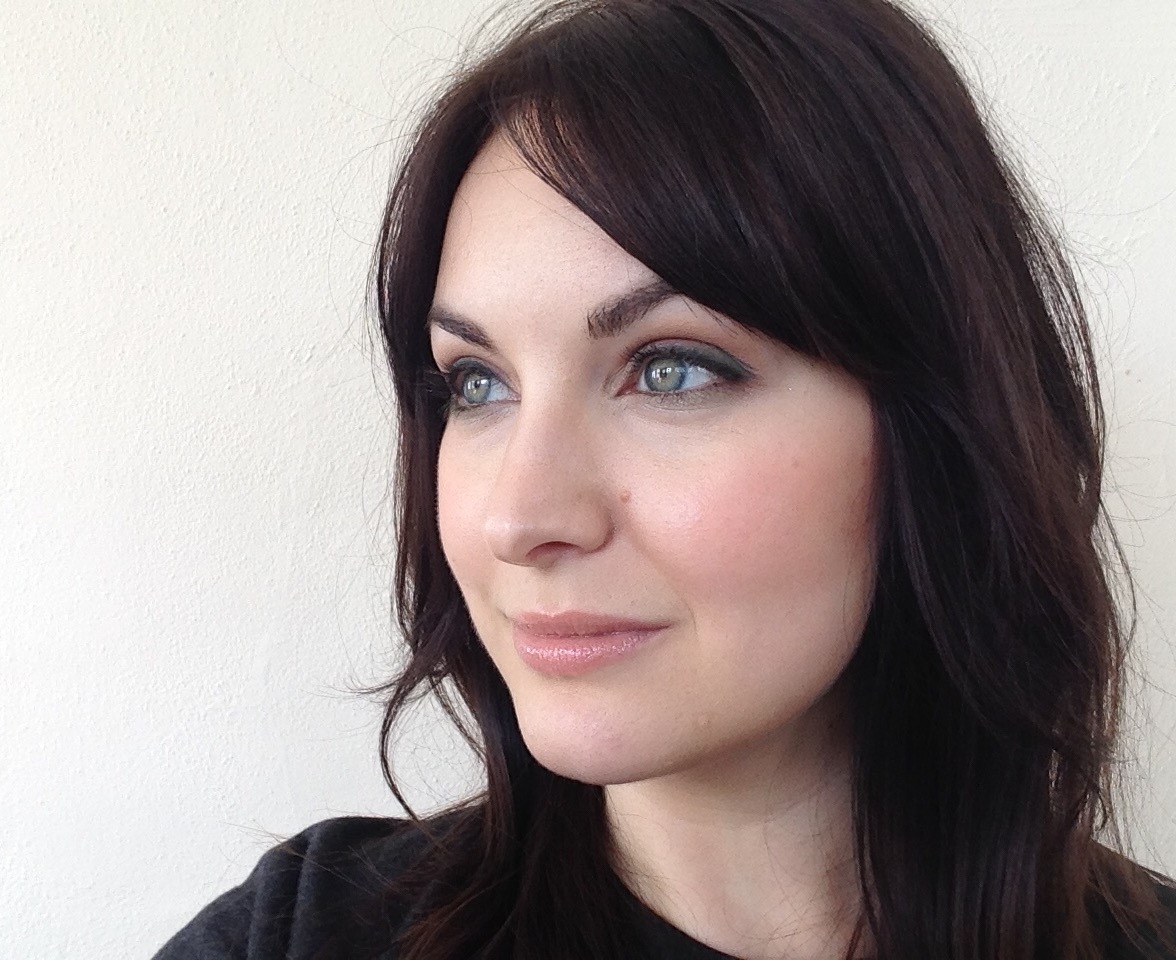
You can do both techniques separately or even at the same time (pictured below) - and if you want color on top and bottom, don't be afraid to try two different, complementary colors.

FullSizeRender (1)FullSizeRender (2)

~~~~~~~~

Whether or not you're celebrating tomorrow's holiday, I do hope you'll give some color a try.  Even if it's subtle, it will make you feel adventurous - and that's one of the best things about makeup!  Keep in touch @ElectraLane on Instagram and Snapchat, and I'll meet you back here next week to share my favorite makeup and skincare splurges.

Technique Class - Eyeliner

IMG_5276.jpg

I had a client with very mature skin and, as we were chatting, she announced that she had never learned how to put on eyeliner.  While some people skip this step, eyeliner is one of my top three makeup products because it makes your eyes look larger and more defined, and makes lashes look thicker. In my opinion, the trifecta of eyeliner, mascara and brows negates the need for other eye makeup (or really any other makeup at all). When it comes to eyeliner, practice a little bit to see if you prefer to apply liner in pencil form or with a brush.  I feel I have better control with a pencil, but even so, I use a small brush to smudge the liner into my lash line afterwards.  My go-to for this is the Smashbox 20, but an excellent duplicate at an even better price ($3!) is the e.l.f. Studio Concealer Brush, available here.

Smashbox 20

If you have better control with a bush, you have quite a few options for liner: you can grab the pigment from a pencil, use a gel or liquid liner, or use a powder liner (or even an eye shadow).  My favorite liner brush is a run-of-the-mill angle brush:

 IMG_5322

To apply, either with a pencil or bush, I use small dashes from the outside corner of my eye to the middle, then go from the inside corner of my eye to the middle.  Then I connect everything either with the smudge brush if using a pencil, or, if using a brush, I go back over the line a few times to smoothe everything out.

For a wonderful, all-inclusive tutorial, check out the video below.  Happy lining!

Technique Class - The Outer Corner

IMG_5282.jpg

A dark, smoky outer corner of the eye lid is hugely popular right now. Not only does it add depth, but it can create an instant eye lift. But it's tricky to master.  My top three tips are to make sure the eye shadow you use is dark enough, to blend well using a clean bush, and to practice.

When it comes to application, make sure to use a small enough brush, smudge the color into a V on the outer corner, then tap the color to fill in the V.  Finally, blend the color inward with a clean brush.  If the color isn't dark enough, add more.  And if you blended the color in too much, just take a different brush with a pale color and sweep from the inner corner toward the outer corner.

Since it's difficult to explain, check out the video below for a demonstration.

YouTube

For another take, as well as a phenomenal tutorial for those with hooded eyelids, click HERE for a demo by Wayne Goss. 

Technique Class - The Crease

IMG_5274.jpg

One thing that remained the same over my 17 years as a dancer was technique class.  No matter your level of proficiency, no one was ever above starting the day/rehearsal with a class in the basics. As a makeup artist, I've had the pleasure of working with a vast array of clients.  Still, despite differences in skin color or age or skin type, I am consistently asked about the same three or four concerns.

So, I decided to combine these two topics into a series that will run through the end of next month to show you how I approach certain makeup situations.

Today, we'll start with the crease of the eye.

First and foremost - it is very important to manage expectations here.  Every eye shape is different and there are a so many great blogs and YouTube videos on the subject if you want in-depth info.  For now, we'll focus more on basic anatomy.

You want to get to know your eye, so figure out where the lid is:

IMG_5273

Your lid, in terms of makeup, is the skin that just covers our eyeball.

Where the lid breaks when you eye is open is considered your crease:

IMG_5274

Not everyone has a crease, but that's fine!  You don't need one.  If you have a monolid, you can create one if you want to, and if you have a hooded lid, you'll just have to join the ranks of Giselle, Blake Lively, and Jennifer Lawrence (oh, darn) and focus on the lash lines.

Next, find your brow bone, or orbital bone:

IMG_5270

It's the bone that sticks out near your eye brow.

Everything between those two points can be considered the crease area:

IMG_5271

If you do have a crease, your crease area will vary.  I have a really large one - and if I fill it in with too much dark shadow, my eyes look closed; too little, my brows look too high.  Some folks who have deep-set eyes only have a very thin area.  It's all good!

We fill in our crease to make our eyes look larger because, as I show here,  darker colors make things recede and lighter colors bring things forward; if that crease area recedes, the eye lid comes forward - making it appear larger.

When filling in the crease, start in the outer corner and sweep inward with a slim brush like the MAC 217, then blend the edges with a brush like the MAC 224.

Now that you know where your crease is, have fun creating new looks - and upload a photo to Instagram/Twitter with the hashtag #byoma so I can check them out!

Blurred Lines

easy.jpg

Most eye makeup application is horizontal.  I’ve found a shortcut, and it requires vertical application.  Not only will this look work on every eye shape (since it doesn’t discriminate based on where your natural crease lies), but it can fulfill every look from The Work Appropriate to The Go-To Glam based on the contrast, intensity, and finish of the shadows used. For every day, cream shadow that melts into a soft brown will give polished definition, while a shimmery taupe blended with a deep, rich plum is perfect for a big event – especially when peeking from under wispy false lashes and paired with a sophisticated nude lip.

I made a video to demonstrate this technique using M.A.C. shadows in Folie, Honesty, and Dazzlelight.  Have fun playing around with different shadows and remember as long as you blend well, you can go from very pale to very dark.