How to Get Disney Princess Skin

Disney.jpg

I've been playing around with the "buffing technique" for a little over a year, and I can't believe how cool this trick is...you'll see the proof at the end. It makes me feel like a Disney Princess, and I hope you'll give buffing a try. P.S. If you could see me right now, I'm doing my happy dance, which kind of looks like this:


via GIPHY

I'm so thrilled because I've spent hours upon hours of my life sifting through YouTube footage and blog posts about buffing, then trying out different combinations of all that info, so I can definitively state that layering proudcts in a certain way, then buffing them all together, makes your skin look insanely beautiful. Stick with me - this post is a long one - but I'm taking off next week to celebrate Thanksgiving so think of it as a two-for-one special!

Step 1: Skin Prep

There's a lot going on with this look, so it's imperative that your skin is ready. I make sure to follow my normal morning skincare routine: cleanse, exfoliate, tone, apply serum/eye cream/moisturizer. If I have time, I also like to do a peel or mask after the exfoliation step.

Glossier

Once I'm ready to start with the makeup, I use a thin concealer on my lids and dust on a light layer of translucent powder. I then mix a primer with an illuminator, and smooth the concoction all over my face and neck.

Step 2: Eyes

Do whatever your heart desires here - I would suggest, at a bare minimum, curled lashes with two coats of mascara.

Here is an easy smokey eye and an over-the-top gilded eye to try.

Step 3: Skin

Now we're getting to the good stuff. Here is the inspiration...

...but I had to take it in another direction. It's like a recipe - I always follow the instructions the first time, but then I start tweaking it to fit my needs. This method requires layers upon layers of makeup that no one really has time to apply (this video, by far, shows the least - many I've seen do a primer, thick foundation, cream contour, highlight and illuminator, concealer, powder, powder contour, powder blush, bronzer and illuminator, and a shovel to remove it all later), so here's my version - which you'll see in action on Friday:

Primer * Concealer * Foundation * Setting Spray * Loose Powder * Powder Contour/Blush/Bronzer/Illuminator * Buff with Pressed Powder * Setting Spray

I realize that still seems like a lot of makeup, but there are a couple of things to keep in mind. First, the addition of the loose powder (this is amazing) keeps you from buffing off your foundation. Second, make sure to add foundation on areas NOT covered by concealer so there is only one layer of product (even though there are two products).

Step 4: Brows and Lips

Fill in your brows, add your favorite lippie and you're done! I'm not wearing any lipstick in the photos below because I got so excited about the skin that I just hauled off and started snapping. Please forgive me.

*Can't-Miss Tips*

*Sheer down the foundation by adding some moisturizer, primer or illuminator (unless you want full coverage) to keep it light

*When it comes to the powder blush/bronzer/contour part, you don't have to do all three. I would suggest picking at least blush or bronzer so the face has dimension - and if you do contour, I would also blend that out with some blush and/or bronzer

*Make sure setting spray dries before adding loose powder. This is still my favorite.

*This one is important! When applying the loose powder, you need to use a powder puff or sponge to press and roll the powder into the skin. Don't be afraid of it! You'll knock off the excess when buffing

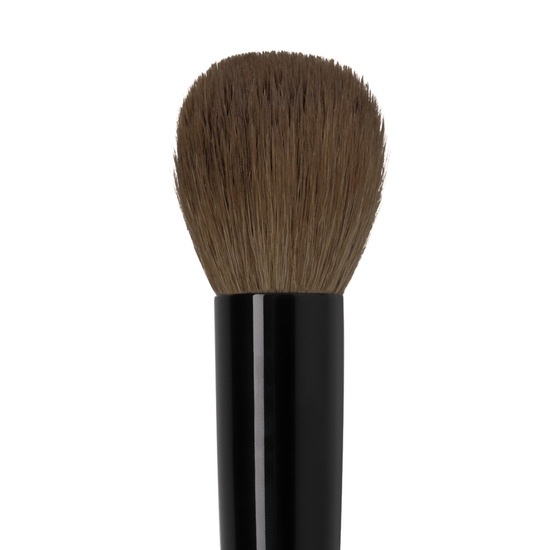
*The buffing brush doesn't have to be special, but it should be soft with a flat-ish top. A great steal is from Real Techniques - only $9! For a luxury option, you can't beat Wayne Goss's #13 for $53.


Real Techniques

Wayne Goss

The Three Things That Make This Awesome

Out of all the versions of the buffing technique I tired, these are the three constants, the three things you must do in order for this to work:

  1. Make sure your concealer and foundation do not overlap
  2. Press the loose powder over the entire face
  3. Don't be scared to buff for a while, making sure to use the smallest amount of pressed powder on the brush

The Proof

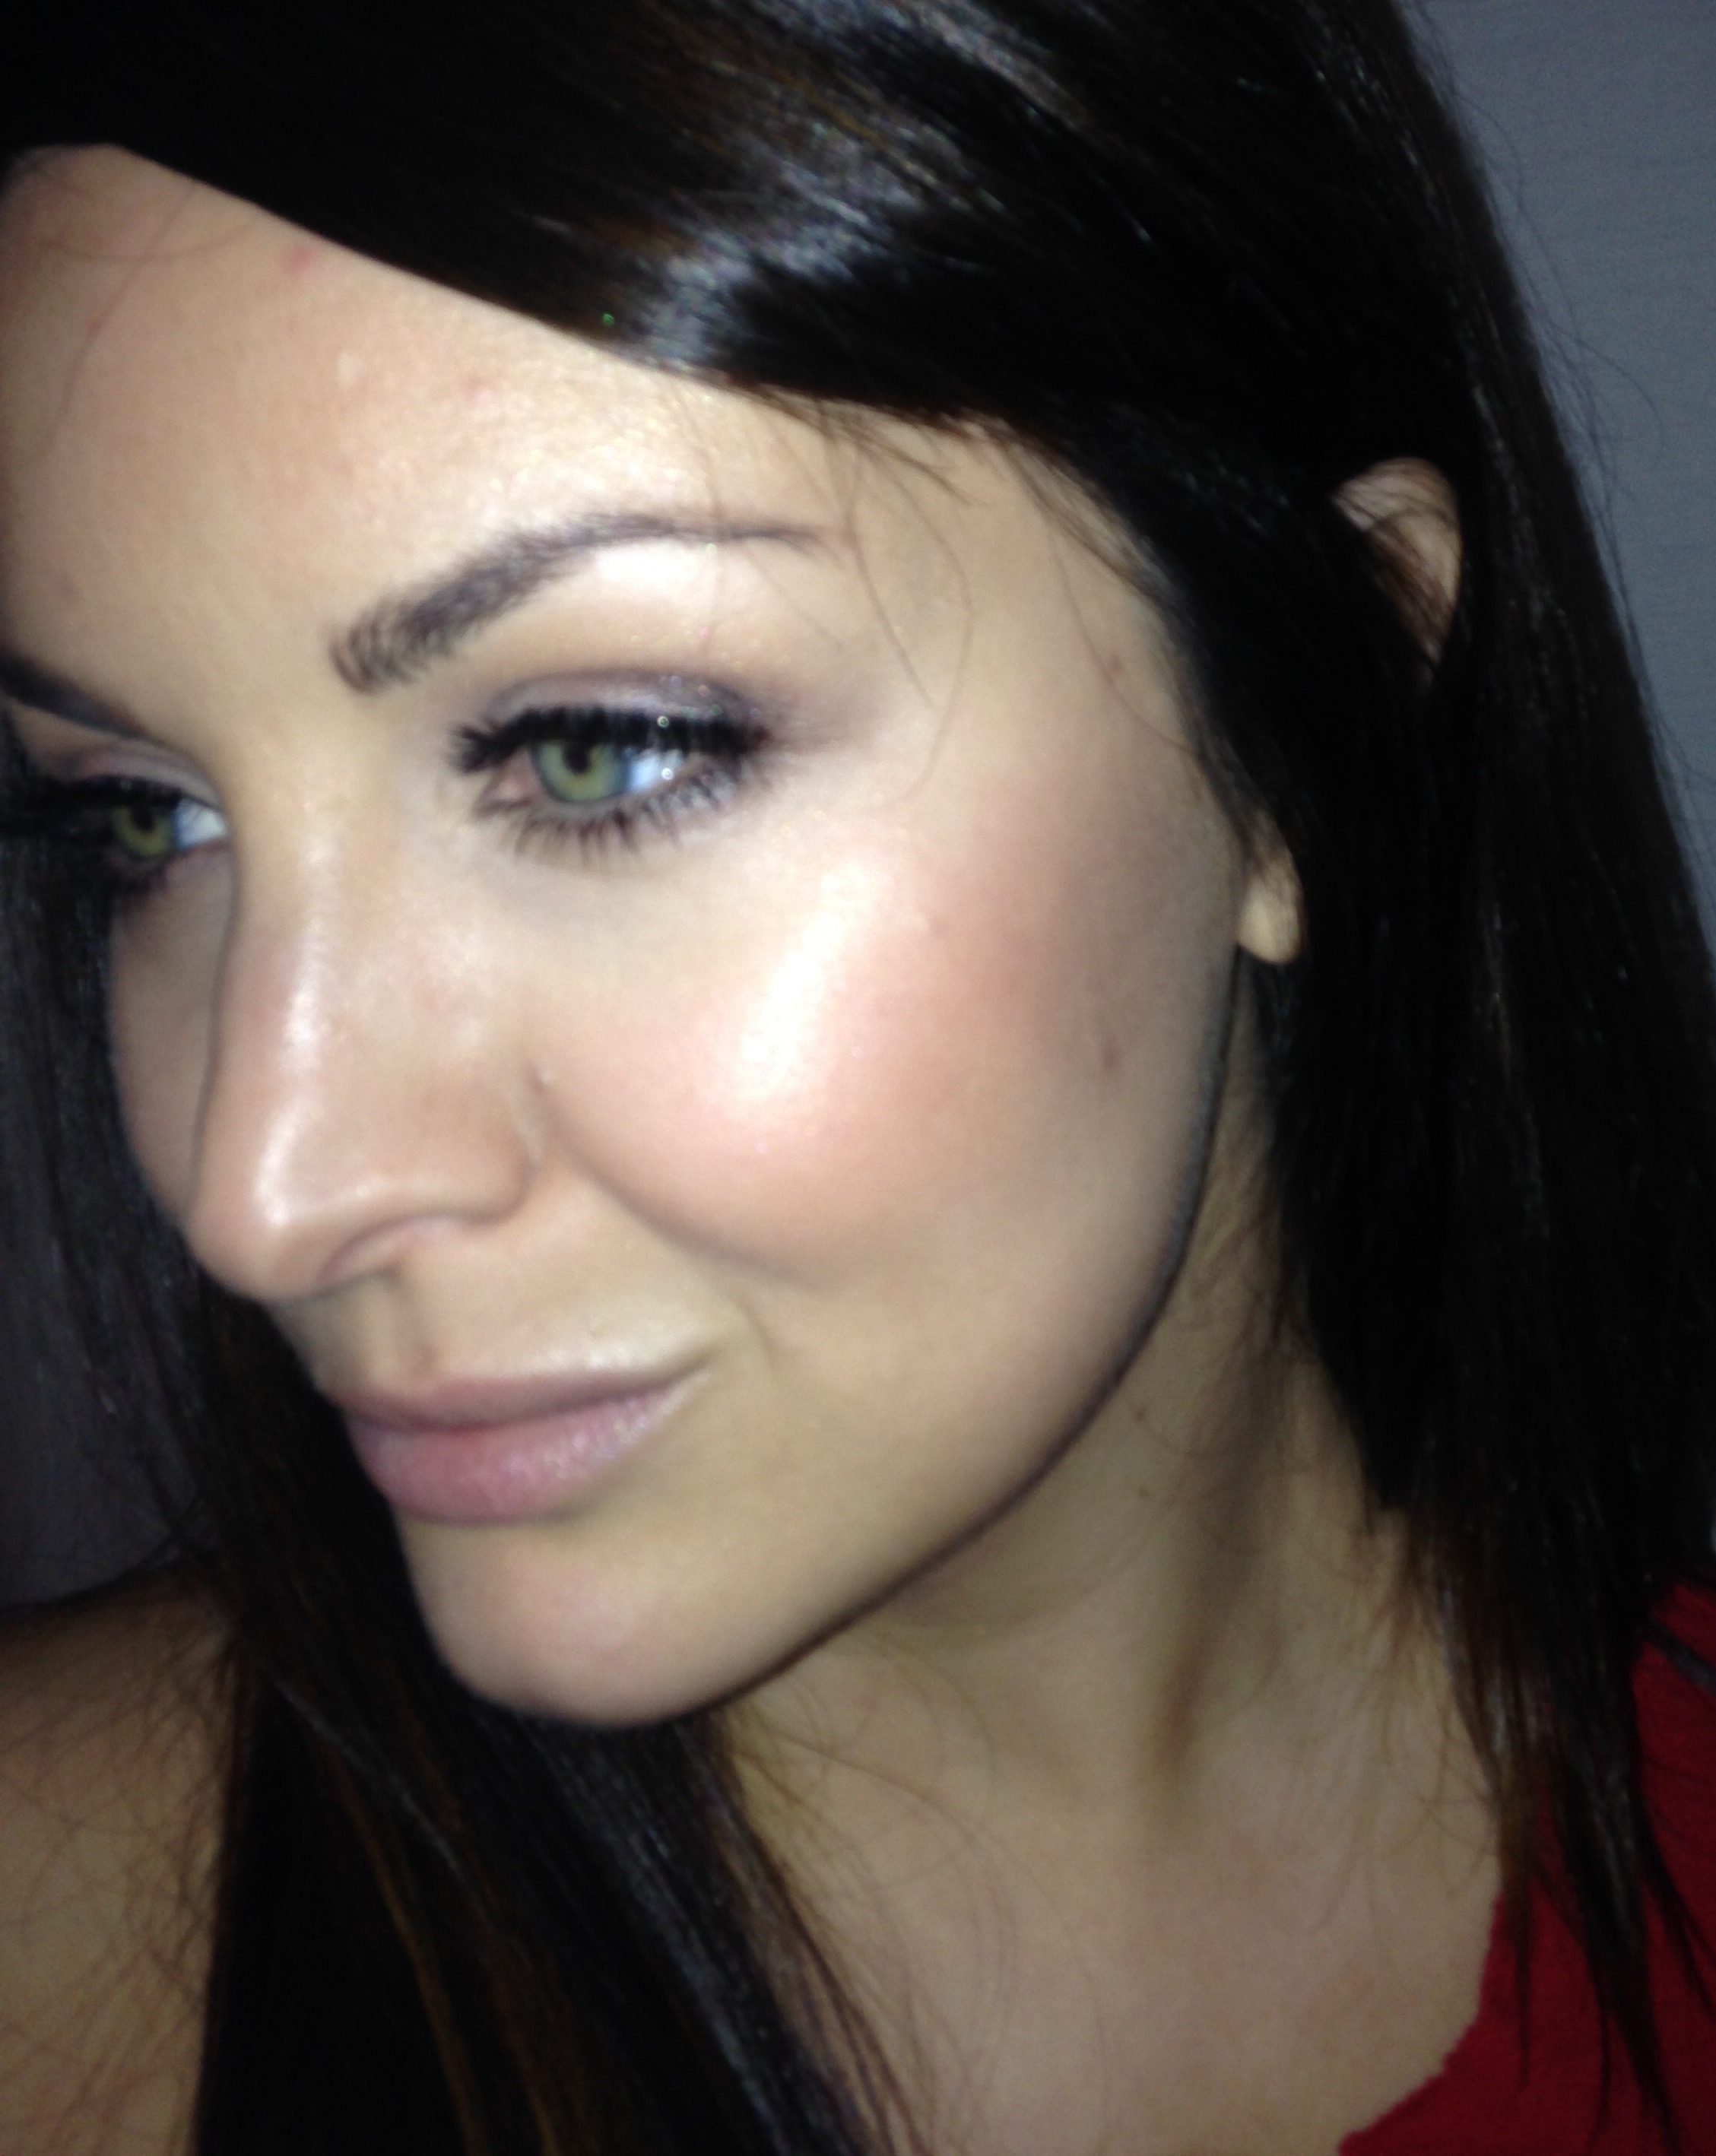
These are un-retouched, unedited iPhone photos in a dark room with a flash - a.k.a. the worst light possible.

image1 image2

RIGHT?! You can still my skin - I intetionally did not cover sunspots/freckles/pimples to show that even with all of those "layers," the buffing action beautifully blends everything together and makes the makeup look like it's your skin (if your skin were made of glass).

~~~~~~~~

I feel like I need a nap after all of that. I really do hope you'll give this a try, and don't forget to follow @ElectraLane on Facebook and Instagram so you don't miss the Friday Flash of this look (a sped-up demo). As always, thanks for stopping by, and please subscibe to this blog! As I mentioned, I'm taking next weekend off for Thanksgiving, so I hope you enjoy your week.

Images: Author, Ulta.com, Beautylish.com, Google Images

Every Day Contour

I think everyone wants defined features, but, for every day, not everyone has the time to contour. And since lots of people still seem confused by what contouring is, I'm going to share a little about contouring, then give you two quick ways to rock it. We contour to give the face dimension. Think about it: if you put one color all over your face, i.e. just foundation, your face will look flat. Add some shading, and things become more interesting. Here's a visual:

yellows

And, so, we introduce blush and bronzer and contour and highlighting into our makeup routines. So...how and when do I contour on a daily basis?

Create Shadows

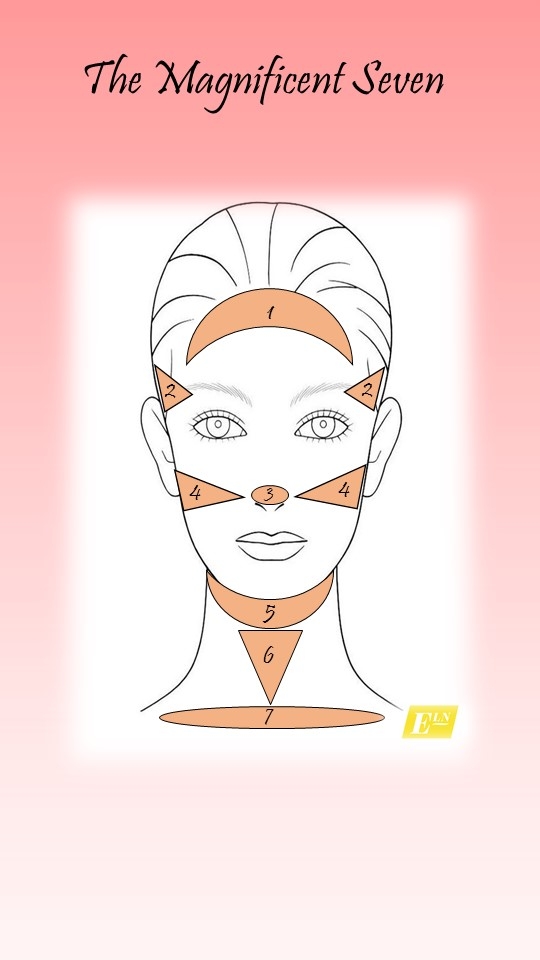
For true contour, I use a small brush to precisely and strategically place a grey-ish powder. For every day? I take a big, fluffy brush (this one is my favorite) and sweep bronzer in seven places to create subtle shadows:

magnificent-seven

  1. Top of forehead
  2. Temples
  3. Nose
  4. Cheeks
  5. Chin and slightly under jawline
  6. Down center of neck
  7. Under collar bones

If this seems confusing, just think about the last time you were in the sun - what parts of your face showed color? (Hint: it's usually the parts that stick out.)

Liquid Smudges

When all else fails, take a little concealer (in a shade a couple darker than your foundation) or a liquid bronzer and finger paint! Because this technique can get a little messy, I usually apply the cream or liquid just under cheek bones.

fp3

~~~~~~~~

I contour every day because I love how it makes me look alive and gives my face structure, even if I'm not wearing anything else except brows, mascara and gloss. If you liked these tips, make sure to subscribe so you can learn more, fun makeup tricks - we can also keep in touch on Facebook and Instagram @ElectraLane.

Hallie's Photo Shoot

14237762_10210851723755071_427042203735288359_n.jpg

A few weeks ago, I had the pleasure of hosting my friend, Hallie, and her uber-talented photographer friend, Jessie in my makeup studio. Jessie was taking family portraits for Hallie, so I wanted to share some tips on how to create a paparazzi-worthy look for your own photo shoot.

Prep the Skin

When taking photos, the makeup is usually heavier than usual, so your skin has to be ready for it.  I've learned over the years that that means skin needs to be hydrated (even if it's oily) to accept setting powder.  I start by applying under-eye masks and a skin type-appropriate primer.  My favorites (because they work on everyone!) are the Klorane Smoothing and Relaxing Patches for eyes, the Glossier Priming Moisturizer for dry-to-normal skin, and Embryolisse Hydra-Mat for normal-to-oily skin (or if it's hot out).

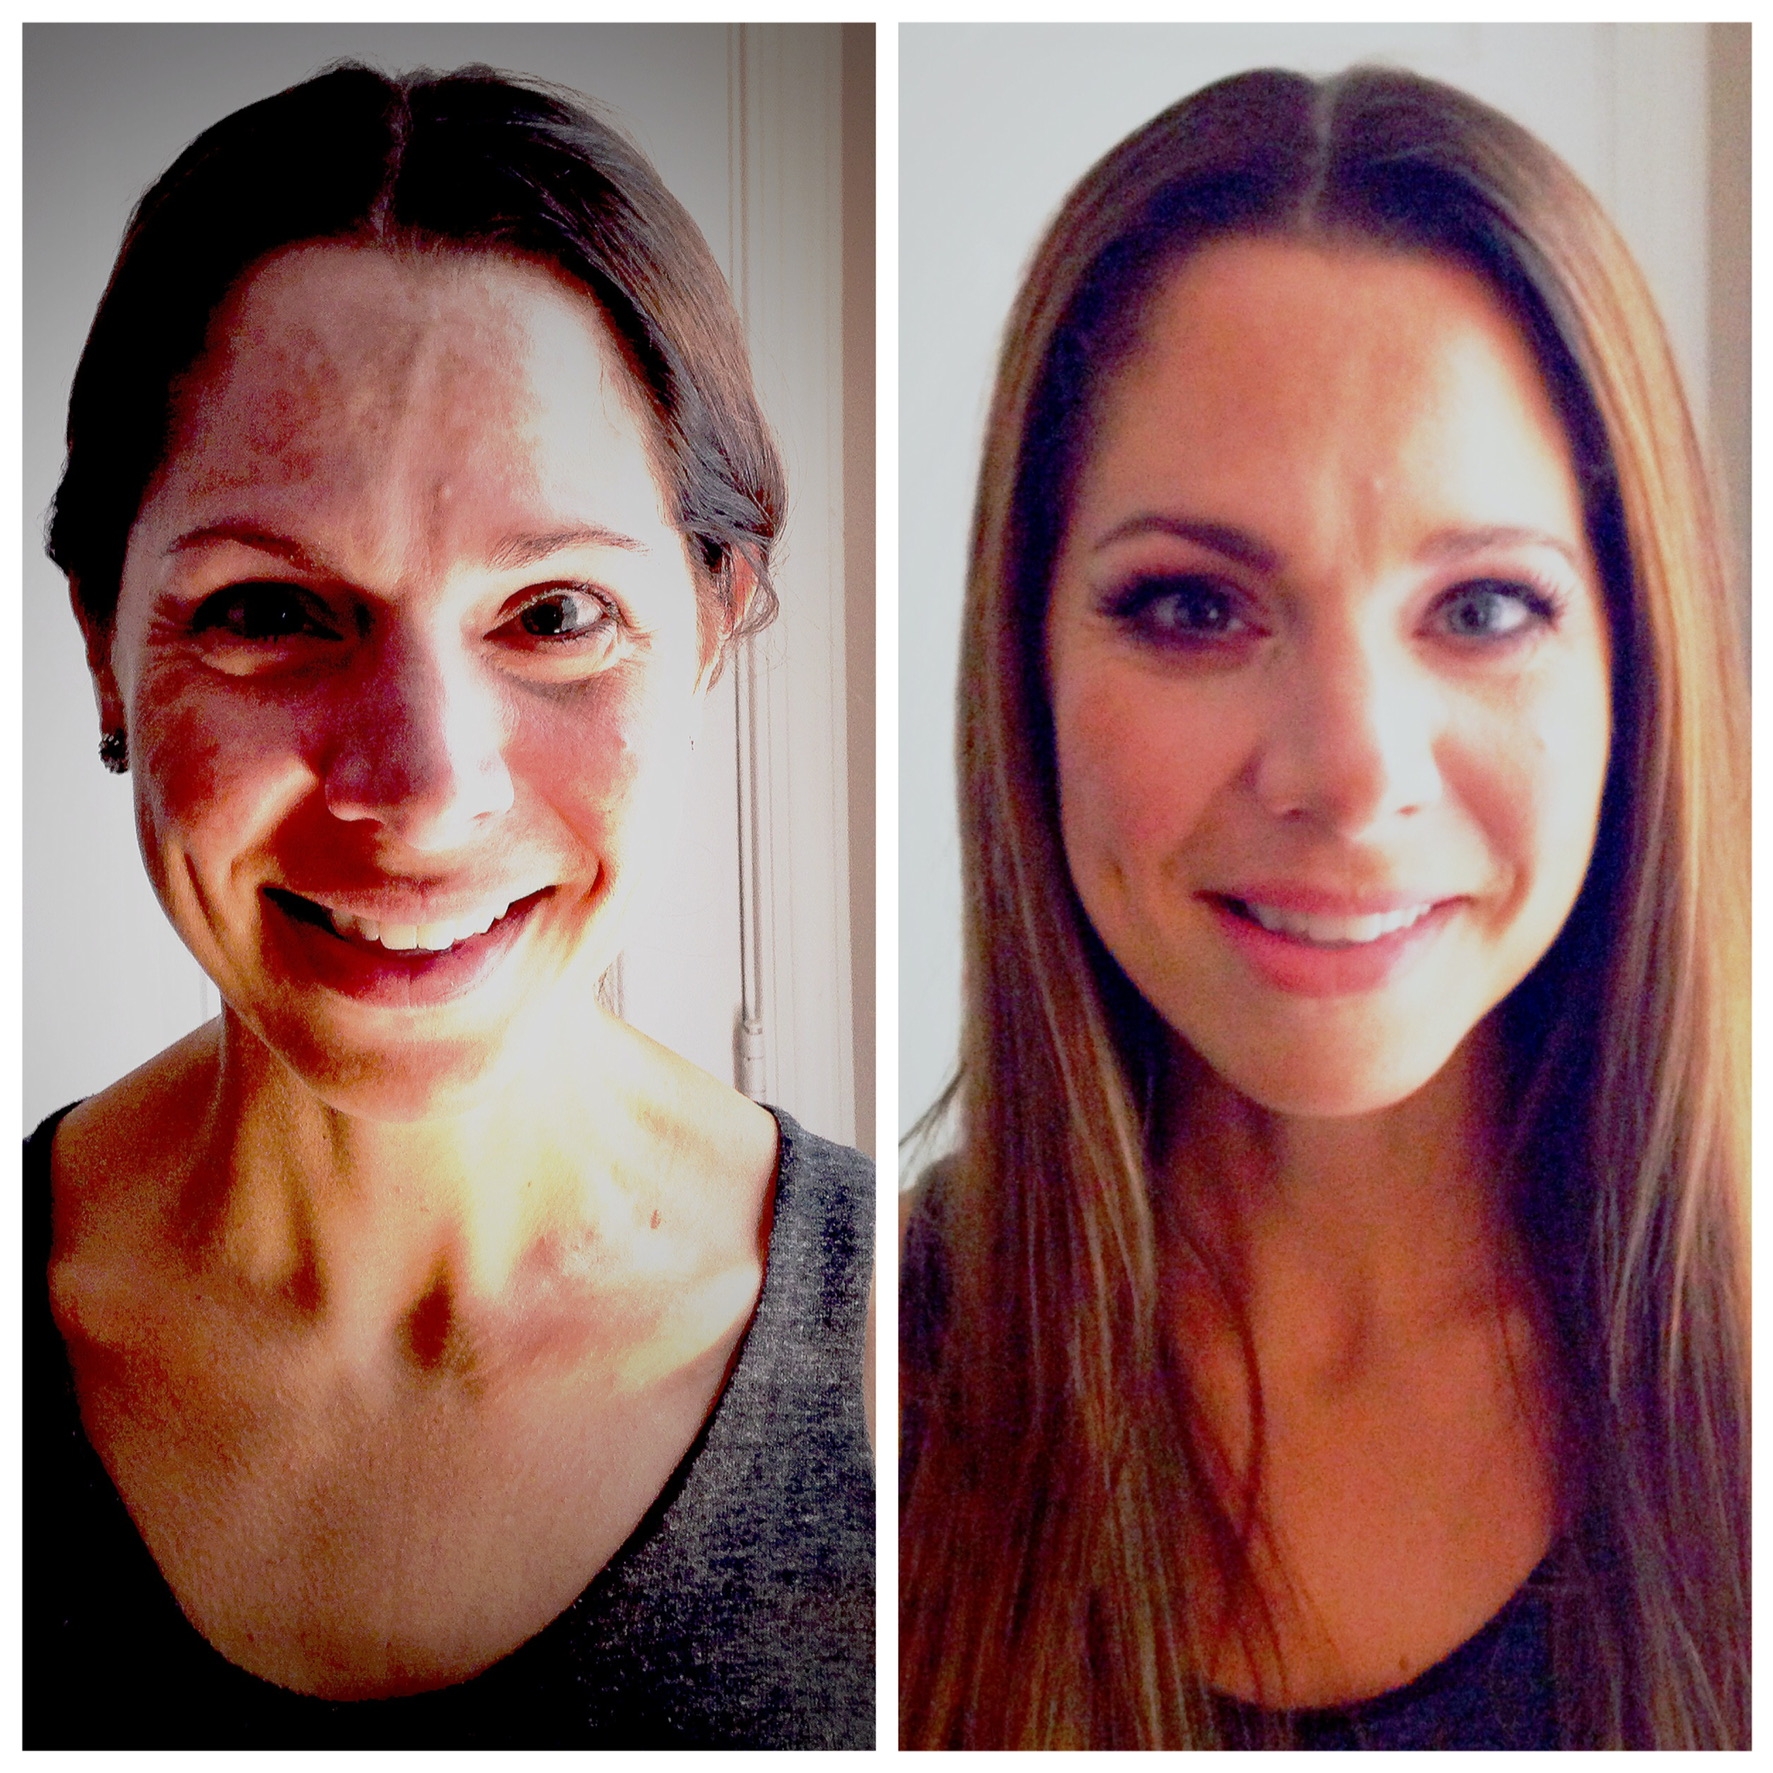
Please pardon the awful lighting, but this hottie is gorgeous before and after makeup.

Structure Over Trends

I can't tell you how many photos of Kim Kardashian I used to get when doing clients' makeup.  As phenomenal as her makeup is, it's created for her bone structure and coloring - in other words, what looks great on her might look awful on me because we look so different.  When it comes to photos, it's important to focus on your individual needs, so the emphasis should be on etching out your features and bone structure.

Color, Color, Color!

blush

This is the blush I used on Hallie - it's Exhibit A by NARS.  I almost always use this, or a bright pink, on all of my photo clients.  Especially when taken outside, the natural light can really wash you out so if you don't have on more color than you think you need, the makeup won't even show up. If you're nervous about using too much, take a selfie in front of a window to see what is and is not showing up.

~~~~~~~~

Here are the un-retouched photos. I mean...wow. You can't tell, but this day was SWELTERING - they made it look like a crisp fall day. And please ignore the fact that I cropped out Hallie's family from these photos, weirdos on the internet don't need to see her kids. If you'd like to discuss how to perfect your own photo makeup, check out the "services" tab and email me: Jessica@ElectraLane.com.

wineryshoot050 wineryshoot061

image1

For more info on these lovely ladies, you can subscribe to Hallie's fantastic blog, Tightrope In Heels, for the best how-to-do-life advice. Reading her blog is like meeting a friend for coffee, so definitely check it out. And you must visit Jessie's website to view her incredible talent. Thanks Hallie and Jessie for letting me share your images!


Images c/o Jessie Preza Photography and Google Images

Super Skincare and Glorious Glosses

Nars-ITG-featured-image.jpg

You know how you picture something in your head, and then you get it in real life, but your imagination was better? This happens so often with makeup. A company launches an exciting new product, I get a sample, and am so let down.

But, every so often, companies launch new product lines that surpass expectations.

Here are two launches, one skincare and one makeup, that blew my mind in a great way.

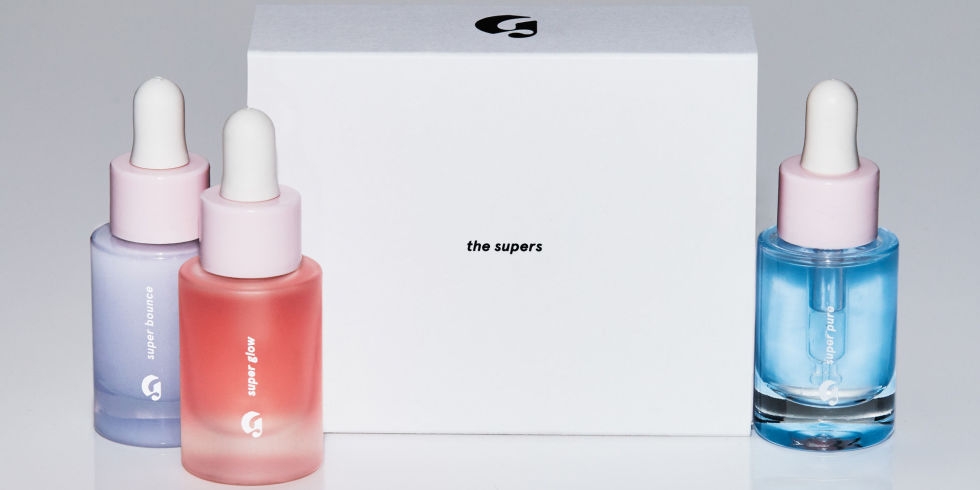
Glossier The Supers

landscape-1473821609-supers-trio-product-06

Whether your purchase one serum or all three, you will not be disappointed. These serums work, and their price is on point - $28 each or all three for $65. Not sure which one to pick? Think about skincare like vitamins: sometimes you need more vitamin C if you're sick or iron if you're tired. Likewise, you can use serums to combat different issues on a case-by-case basis or to address a specific concern daily.

The Super Bounce is for a hydration boost (something to think about now that we're headed into colder months), Super Glow is brightening, and Super Pure is for angry, irritated skin. Another option is to add a few drops of your preferred serum into your moisturizer to create a killer night cream. Use this link to get 20% off your first purchase (which does give me a small kickback - thank you!).

NARS Velvet Lip Glide

Image c/o NARSCosmetics.com

Never a fan of liquid lipsticks no matter how many I've tried, I didn't even know this was technically a liquid lipstick. I thought it was a matte lip gloss. But, like the website states, this product truly "glides like a gloss, cloaks like a lipstick - and feels like nothing else." Holy wow. It feels like a satin lipstick; while it is matte, it doesn't feel dry and flaky, and it applies like a gloss. My favorite colors are Stripped, a nude, and Unlaced, a light pink. So yummy, definitely check these out.

Please stay in touch @ElectraLane on Instagram, and never miss a post by subscribing to this blog. Have a great week!


Images c/o NarsCosmetics.com, MarieClaire.com and IntoTheGloss.com

How to Get the Perfect Smokey Eye

image1-1.jpg

It's fascinating that every time I get a woman in my makeup chair, she wants to look glamorous. But as I add the glam, she starts talking about how she really just wants to know how to do eye liner for every day, or how to do makeup that also makes her look like the best version of herself. So I created Electra Lane, to bring you all my tips and tricks and knowledge and hands-on info I learn from painting faces, in the hopes that you could have a resource for the more practical side of makeup since there is so much over-the-top makeup inspiration out there.

But guess what?

While folks need to learn practical makeup, I think they want to at least know how how to get the enchanting smokey eye and chiseled contour.  So, in my attempt to bridge the makeup gap between inspirational and attainable, I will be posting more in-depth blogs, videos and posts mixed in with the basics.  To make sure you don't miss any of these goodies, please subscribe to this blog, to my YouTube channel, and follow me on Instagram or Facebook.

This week, I'm sharing the two things you need to know in order to get the perfect smokey eye, as well as a video tutorial for a classic smokey.

image2-1

Blend Like a Pro

You hear it all the time - the perky YouTuber chirping, "Blend, blend, blend!"  So you "blend," only to have shadow all over your eye and no distinction between the colors you've used. To blend properly, make sure you're blending with a clean brush, or at least a brush you used on a shadow lighter than the one you're trying to blend (you'll see this in the video - I only use one brush for the whole lid). Then, you want to keep your blending just where you want your shadow to be. A good rule of thumb is to not go below your top lash line or beyond the tip of your eye brow.

img_3405

Layer Appropriately

The biggest "Aha!" moment I had in makeup is when I started layering my eye shadows. In my opinion, the best eye makeup I do uses a minimum of six colors. Seriously (if you want to see how to create this gradient of color, this Jaclyn Hill video is a great example - start at 1:45). A big mistake I see is when people start with a really light color, then go in with a really dark color.  You have to have something for the darker shades to blend into (which you'll also see in the video below), so make sure to gradually go darker with your shades.

And now, the tutorial:

~~~

Thanks so much for stopping by and, if you like what you see, please feel free to like and share this post!